
Gas grill burners endure intense heat, grease, and moisture every cooking season. Over time they corrode, crack, or clog, producing uneven flames, cold spots, or dangerous flare-ups. Replacing them is one of the most cost-effective repairs a grill owner can make, typically extending the life of a mid-range grill by several additional seasons.
This replacing gas grill burners guide covers everything from diagnosing a failing burner and sourcing the correct replacement part to the full removal and installation process. No advanced mechanical skills are required. With basic hand tools and about an hour of time, most homeowners can complete this repair and return their grill to reliable, even-heating performance.
Signs Your Grill Burners Need Replacing
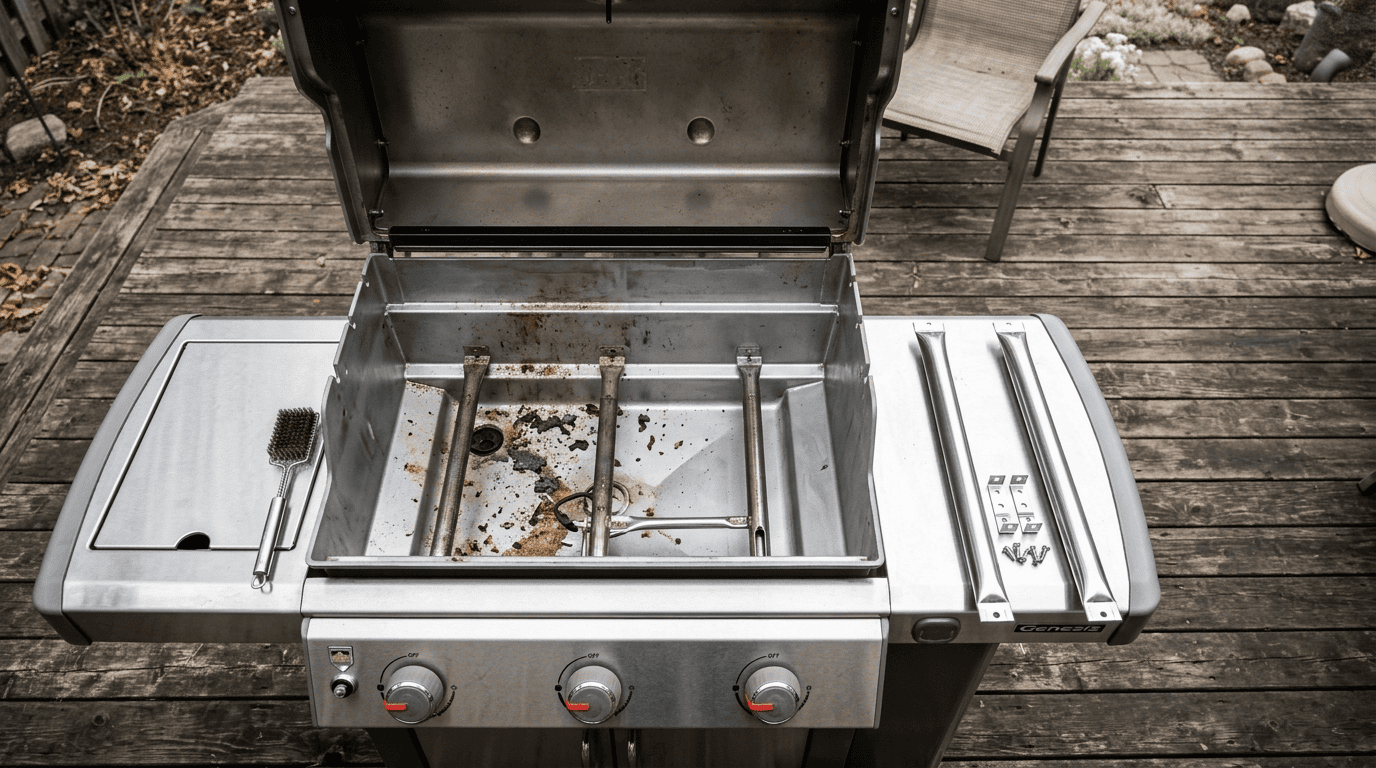
Knowing when to replace rather than simply clean a burner saves time and prevents safety hazards. Key warning signs include visible rust holes or cracks along the burner tube, flames that are yellow or orange instead of blue, large sections of the burner that produce no flame at all, and persistent uneven heating even after thorough cleaning. If a burner feels brittle, flakes heavily when brushed, or has physical breaks in the tube, replacement is the correct solution. Occasional clogged ports can often be cleared with a wire brush, but structural damage cannot be reversed by cleaning. Inspect burners at the start and end of each grilling season.
Gathering Tools and Sourcing the Right Replacement Burner
Before purchasing a replacement, locate your grill's model number, usually stamped on a metal plate inside the lid or on the cart frame. Use this number to search the manufacturer's website or a reputable grill parts retailer for an OEM or compatible aftermarket burner. Universal burners exist but require careful measurement: record the burner length, the diameter of the venturi tube opening, and the port pattern. Tools needed include a Phillips and flat-head screwdriver, a socket wrench set, needle-nose pliers, a wire brush, and heat-resistant gloves. Having penetrating oil such as WD-40 on hand helps loosen corroded screws and retaining nuts without stripping them.
Safety Preparations Before You Start
Safety must come first when working on any gas appliance. Disconnect the propane tank by turning the valve fully clockwise, or shut off the natural gas supply valve at the wall or meter. Open the grill lid and allow any residual gas to dissipate for at least five minutes before proceeding. Work in a well-ventilated outdoor area away from ignition sources. Never use a flame to test for gas leaks during or after installation. Keep a fire extinguisher nearby as a precaution. Wear heat-resistant gloves to protect against sharp metal edges on old burners. Double-check that the igniter switch and all control knobs are in the off position before touching any internal components.
Removing the Old Burner
Start by removing the cooking grates and setting them aside. Lift out the heat tents or flame tamers that sit directly above the burners, noting their orientation for reinstallation. Most burners are held in place by one or two retaining screws at the rear of the burner tube and slot into a port collar or valve orifice at the front. Apply penetrating oil to any corroded screws and wait three to five minutes before attempting removal. Unscrew the rear retaining fastener, then gently pull the burner rearward to disengage the front venturi tube from the valve orifice. Do not force it. If it resists, wiggle it slightly side to side while pulling. Dispose of the old burner according to local metal recycling guidelines.
Installing the New Burner
Before installing, use a wire brush to clean the valve orifice opening where the venturi tube will seat, removing grease and debris that could restrict gas flow. Slide the front venturi tube of the new burner over the valve orifice, ensuring it seats fully and aligns straight. A misaligned venturi will allow gas to escape outside the burner, creating a safety hazard. Once the front is seated, position the rear of the burner tube over its mounting bracket or push it into the rear retaining slot. Insert and hand-tighten the rear retaining screw before snugging it firmly with a screwdriver. Do not overtighten on cast iron brackets, which can crack. Reinstall heat tents and grates in their original positions.
Testing for Gas Leaks and Flame Quality
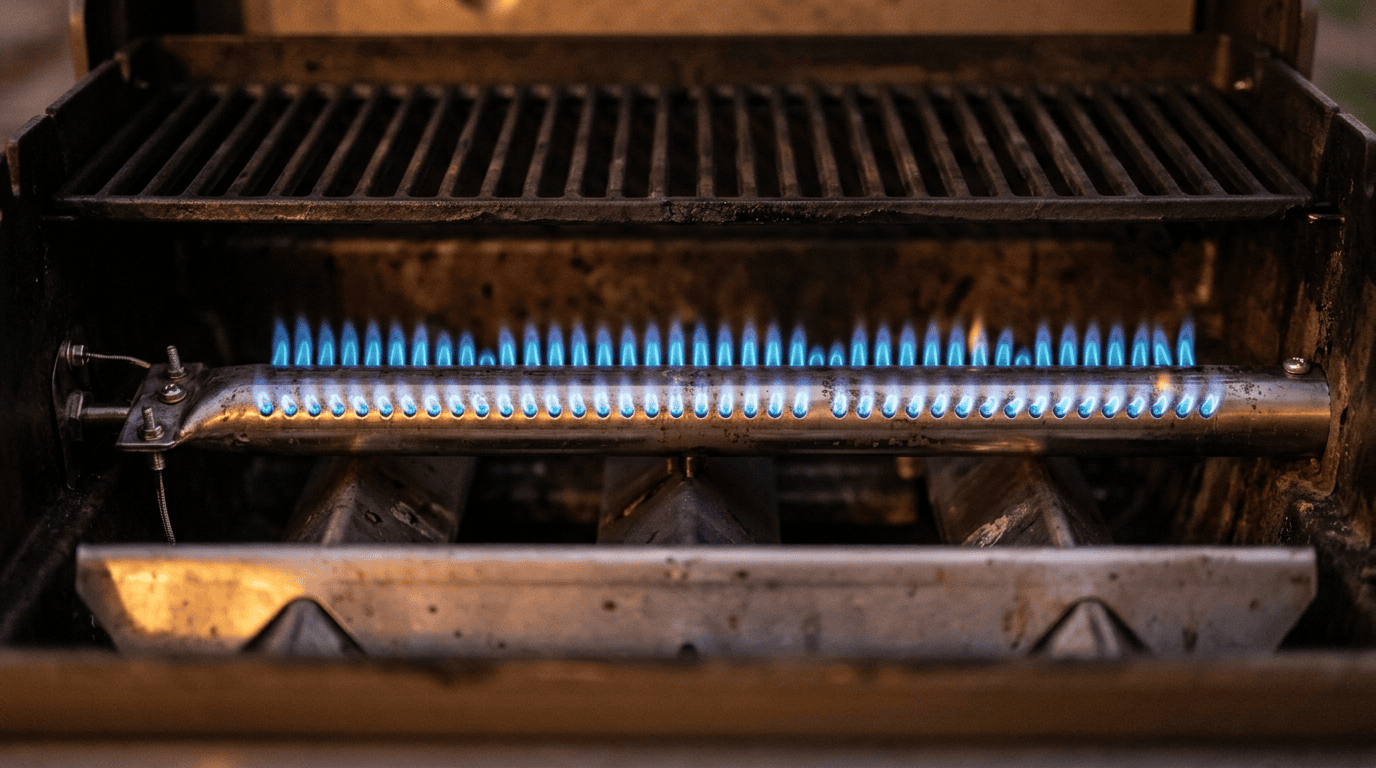
Before lighting the grill, perform a leak test on all connections. Mix equal parts dish soap and water in a small bowl, then apply the solution with a brush or cloth to the venturi tube connection point and any gas line fittings you disturbed during installation. Slowly open the propane valve or gas supply. Watch for bubbles forming at any joint; bubbles indicate a leak that must be resolved before use. If no bubbles appear, proceed to light the grill using the igniter or a long-reach lighter. Observe the flame pattern along the new burner. A properly installed burner produces consistent blue flames across all ports. Adjust the air shutter on the venturi tube if flames are yellow or lifting away from the ports.
Ongoing Maintenance to Extend Burner Life
Replacing burners is straightforward, but preventive care reduces how often you need to do it. After each use, run the grill on high for ten minutes with the lid closed to burn off grease residue from the burners. At the start of each season, remove burners and use a wire brush to clear any clogged ports. Inspect venturi tubes for spider webs or insect nests, which are a common cause of gas flow problems. Store the grill under a weather-resistant cover when not in use to limit moisture exposure, which accelerates corrosion. Stainless steel burners generally outlast aluminized steel or cast iron options in humid climates, making material selection important when choosing replacements.
Practical Tips
- Photograph the burner layout and all connections with your phone before disassembly so you have a clear reference during reinstallation.
- Apply a thin coat of high-heat spray paint to exposed metal brackets after replacing the burner to slow future corrosion.
- If the venturi tube does not slide smoothly onto the orifice, check that you have the correct replacement part rather than forcing the fit.
- Replace all burners at the same time if more than one shows significant wear, since labor and shipping costs make individual replacements less efficient.
- Keep the model number and burner part number written inside a kitchen drawer so you can reorder quickly next time without searching the grill again.
How long does it typically take to replace a gas grill burner?
Most single-burner replacements take 30 to 60 minutes for a person doing it for the first time. Subsequent replacements on the same grill take less time once you are familiar with the fastener locations and fitment of the venturi tube.
Can I use a universal replacement burner instead of an OEM part?
Universal burners can work if they match your grill's length, venturi diameter, and port spacing. However, OEM or model-specific burners offer a guaranteed fit and are the safer choice. Always measure carefully before purchasing a universal option.
What causes a new burner to produce yellow flames?
Yellow or orange flames usually mean incomplete combustion caused by too little air mixing with the gas. Locate the adjustable air shutter on the venturi tube near the valve end and open it slightly until the flame turns blue. A blocked orifice or incorrect gas pressure can also cause yellow flames.
Is it safe to replace grill burners yourself without a technician?
Yes, for most standard gas grills this is a straightforward DIY repair. The critical safety steps are disconnecting the gas supply before starting, ensuring the venturi tube seats fully on the orifice, and conducting a soap-water leak test before lighting the grill. If you smell gas after testing, do not light the grill and consult a qualified technician.