Building fire for smoking meat is the single most important skill any pitmaster can develop, and it is the difference between a backyard cook and a legendary BBQ spread. Before you ever lay a brisket, a rack of ribs, or a pork butt on your grate, you need to understand that fire is a living thing – it breathes, it grows, and it demands your respect. Get your fire right and everything else falls into place at that perfect 225 to 250 degree Fahrenheit sweet spot where low and slow magic happens.
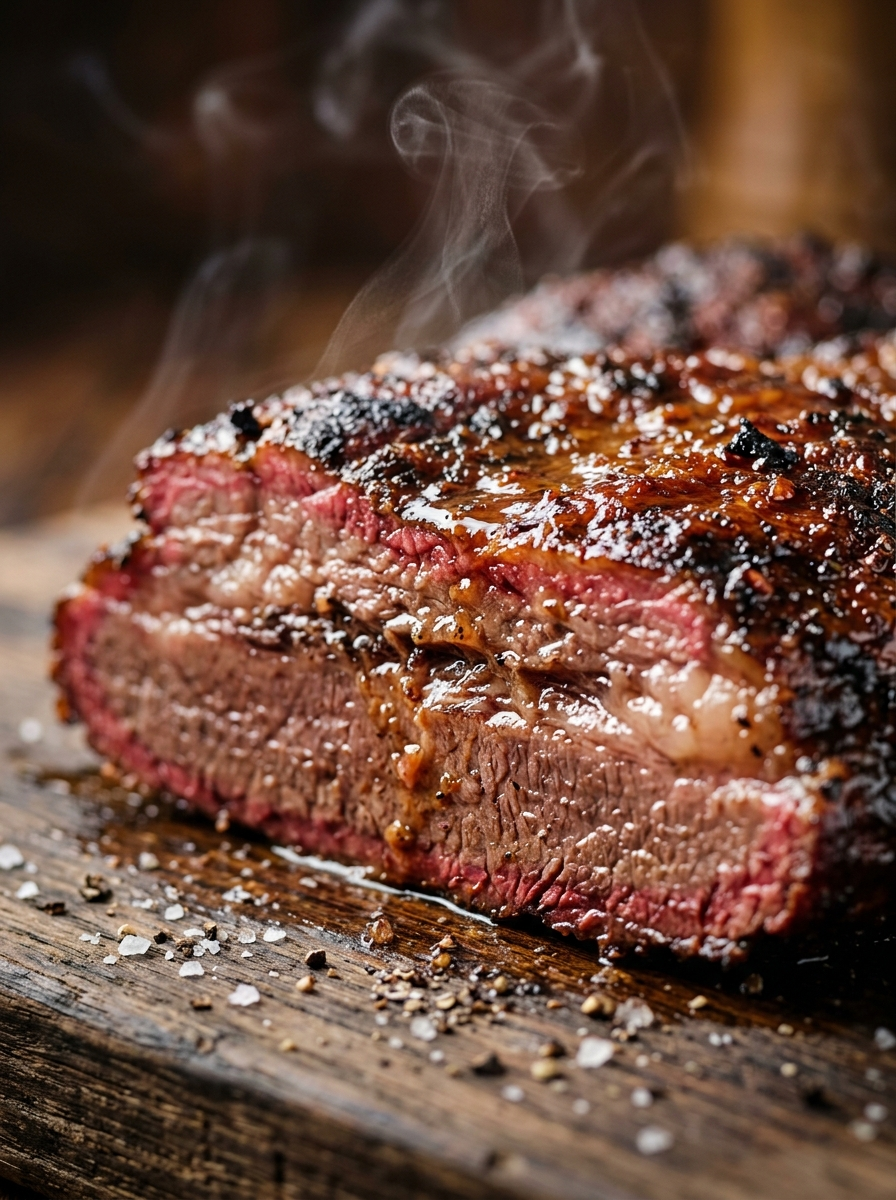
Most beginners make the mistake of rushing the fire. They dump in charcoal, hit it with lighter fluid, and toss on the meat the second they see flames. What they get is uneven heat, bitter creosote smoke, and meat that never develops that gorgeous mahogany bark or the coveted deep red smoke ring that goes a full half-inch into the flesh. A proper fire takes 20 to 45 minutes to build before your first log or chunk of wood even thinks about touching the cooking chamber.
At GrillMasterHQ we have spent years dialing in fire-building techniques from offset smokers to kettle grills, and today we are pulling back the curtain on everything. We are talking coal bed depth, wood chunk placement, airflow management, the two-zone setup, and how to read your smoke color so you know exactly what is happening inside that cook chamber. Whether you are running a 20-inch offset or a classic 22-inch kettle, these fundamentals will transform every single cook you do from here on out.
Building Fire for Smoking Meat: Pitmaster Guide
Building fire for smoking meat is the foundation of every legendary BBQ session. Learn how real pitmasters control heat, choose wood, and maintain that perfect low and slow burn for incredible bark and smoke ring. Your best cook starts right now – fire up the grill today.

Ingredients
| AMOUNT | INGREDIENT | NOTES |
|---|---|---|
| 8 lbs | lump charcoal | or high quality briquettes – or a blend of both for long cooks |
| 4 pieces | wood chunks | post oak, hickory, apple, or cherry depending on your protein |
| 2 full chimneys | lit starter coals | fully ashed over before use – gray with no black visible |
| 1 piece | fire starter cube or newspaper | natural fire starters only – no lighter fluid ever |
| 1 full | water pan | 12 to 14-inch aluminum pan filled with hot water before placing in smoker |
| 1 cup | apple cider vinegar | optional – add to water pan for moisture and subtle flavor |
| 3 lbs | pork shoulder or brisket flat | your choice of protein to smoke once fire is perfected – bone-in for best results |
| 3 tablespoons | your favorite dry rub | apply 12 to 24 hours ahead for deep bark development |
Instructions

Nutrition (per serving)
The BBQ Story Behind This Recipe
The tradition of smoking meat over wood fire stretches back thousands of years across nearly every culture on earth, but the American BBQ tradition we know and love today has its deepest roots in the indigenous cooking techniques of the Caribbean and the American South. The word barbecue itself is widely believed to derive from the Taino word barabicu, describing a framework of green sticks used to slow-cook meat over smoldering coals. When Spanish explorers brought these techniques back to the mainland, they collided with the hog-heavy foodways of the American South and the cattle culture of Texas to create four distinct regional schools of BBQ – each with its own fire philosophy, wood preference, and low and slow doctrine.
In the Carolinas, pitmasters have been burning hickory and oak down to coals for centuries to cook whole hogs over indirect heat for 12 to 18 hours, developing a discipline around coal management that gets passed down through generations like a family heirloom. Texas pitmasters swear by post oak and long offset burns that hold 250 degrees Fahrenheit for 12 hours or more. Kansas City blends hickory with fruit woods for a sweeter smoke profile, while Memphis relies on charcoal foundations topped with hickory chunks for their legendary dry-rubbed ribs. No matter the region, the foundation of great BBQ has always been and will always be the fire itself – built with patience, fed with intention, and respected every single step of the way.
Hot Off the Grill

A Closer Look
Pitmaster Tips for Best Results
- Never use lighter fluid – ever. It leaves chemical residue that you can taste in your meat and it makes controlling fire temperature nearly impossible. Spend 8 dollars on a chimney starter and natural fire starters and never look back. Your smoke ring and your bark will thank you.
- Learn to read smoke color like a language. Thick white smoke means incomplete combustion and bitter creosote flavor. Thin blue or blue-gray smoke that is barely visible is clean combustion and that is what produces the smoke ring and the deep complex flavor that defines great low and slow BBQ.
- The stall is real and it is not a fire problem – it is science. When your pork shoulder or brisket hits 150 to 165 degrees Fahrenheit the internal temp will stop rising for 2 to 4 hours as moisture evaporates from the surface and cools the meat. Do not panic, do not crank the heat. Hold your 225 to 250 degrees Fahrenheit and trust the process. The stall breaks on its own.
- Wood selection matters more than most people realize. Hickory and post oak are bold and assertive – perfect for beef and pork. Apple and cherry are mild and slightly sweet – ideal for poultry and pork ribs. Mesquite burns very hot and very strong – use it sparingly and only for beef. Pecan sits in the middle and works with almost everything. Never use pine, cedar, or any softwood – they contain resins that are toxic when burned.
- Always let your fire stabilize for a full 15 to 20 minutes at target temperature before you put meat on the grate. A fire that has not settled will swing 50 degrees in either direction in the first 30 minutes and you will spend your whole cook chasing temperature instead of cooking great BBQ. Patience before the cook saves you hours of frustration during the cook.
🔧 Pitmaster Equipment
Offset Smoker or Charcoal Kettle Grill: These are the workhorses of authentic low and slow smoking. An offset gives you a dedicated firebox while a kettle uses a two-zone setup. Either way you need real charcoal and wood to get true smoke flavor and proper heat control across a 225 to 250 degree Fahrenheit range.
Chimney Starter: A chimney starter is the most important fire-building tool you own. It lets you get a full bed of uniform, ash-covered coals ready in 20 minutes without lighter fluid. This is non-negotiable for clean, consistent heat every single time you fire up the grill.
Instant Read Thermometer: You need two thermometers – one clip-on probe for monitoring your cook chamber ambient temperature and one instant read for checking internal temp on your meat. Do not trust the dial thermometer that came with your smoker; it is almost always wrong by 25 to 50 degrees.
Long Tongs and Heat-Resistant Gloves: Managing a live fire means moving hot coals, repositioning wood chunks, and adjusting vents near intense heat. A pair of 18-inch tongs and thick silicone or leather gloves keep your hands safe and give you the control you need when things get serious.
Wood Chunks or Splits: Not chips – chunks or splits. Chips burn too fast and produce inconsistent smoke. You want 3 to 4-inch wood chunks for kettle grills or full log splits for an offset. The wood choice determines your smoke flavor profile so choose with intention.
Charcoal (Lump or Briquettes): Lump charcoal burns hotter and cleaner with less ash while quality briquettes burn longer and more consistently. Many pitmasters blend the two – lump for initial heat, briquettes for long sustained burns on cooks that go 8 hours or more.
Water Pan: A water pan placed between your fire zone and your meat creates a heat buffer that stabilizes cook chamber temperature and adds moisture to the smoking environment. This helps prevent bark from drying out too fast and keeps temps steady during those critical first few hours.
🔥 Variations
Pellet Grill Version: Set your pellet grill to 225 degrees Fahrenheit using your choice of hardwood pellets – hickory, apple, or competition blend all work beautifully. The fire-building process is automated but you can enhance smoke output during the critical first two hours by using your grill’s high smoke or super smoke setting if available. Follow all the same timing, internal temp targets, and resting steps for identical results with slightly less hands-on fire management.
Offset Smoker Version: An offset smoker runs entirely on wood splits rather than charcoal. Start your fire in the firebox with two or three splits of kindling and build up to full-sized 16-inch splits over about 30 minutes. You are aiming for a coal bed that is 4 to 6 inches deep before you add your meat. Add a fresh split every 45 to 60 minutes to maintain 250 degrees Fahrenheit in the cook chamber. This method produces the most intense smoke flavor and the deepest smoke ring of any method available.
Kettle Grill Two-Zone Method: A 22-inch kettle grill is one of the most capable low and slow tools in the world when set up properly. Use the snake method with a double row of briquettes arranged in a C-shape, add two wood chunks at the starting end, light 10 coals in your chimney and pour them at the start of the snake. Set your bottom vent to about 25 percent open and your top vent to 75 percent open. This setup holds 225 to 250 degrees Fahrenheit for 6 to 8 hours without touching the fire and is perfect for ribs, chicken, and smaller pork cuts.
Cold Smoking Fire Setup: Cold smoking for cheese, fish, or cured meats requires a fire that produces smoke but very little heat – your target is below 90 degrees Fahrenheit in the cook chamber. Use a smoke tube or a maze smoker filled with wood pellets set in your cooker away from your food. Light just one end of the pellet tube and let it smolder for 2 to 4 hours. This produces abundant cold smoke with virtually zero combustion heat. Perfect for smoked cheddar, salmon, and salt.
❓ Pitmaster FAQ
What temperature should my smoker be for low and slow BBQ?
The classic low and slow range is 225 to 250 degrees Fahrenheit for most cuts of meat. Brisket and pork shoulder do best at 225 to 240 degrees Fahrenheit. Poultry can go a little higher at 275 degrees Fahrenheit to help the skin render and crisp. Ribs are forgiving between 225 and 250 degrees Fahrenheit. Always measure at grate level not at the dome where temps can be 25 to 50 degrees higher than where your food actually sits.
How do I keep my smoker temperature stable for long cooks?
Stable temperature comes from three things: a properly built fire using the Minion or Snake method, small incremental vent adjustments rather than large ones, and patience. Make one small vent change and wait 10 minutes to see the effect before making another. Chasing temperature by making big rapid vent changes is the fastest way to get wild swings. A water pan also acts as a thermal buffer and reduces temperature spikes significantly.
What wood is best for smoking different meats?
Beef pairs best with post oak, hickory, or mesquite. Pork loves hickory, apple, cherry, or pecan. Poultry does well with apple, cherry, or pecan for a milder sweeter smoke. Fish and cheese call for very light woods like alder or apple. The rule of thumb is that the bolder and more robust the meat, the stronger a wood it can handle. Delicate proteins need delicate wood.
Why does my smoke look white and thick instead of thin and blue?
Thick white smoke means your wood or coals are not burning at a high enough temperature for complete combustion. This is almost always caused by adding wood too early before a proper coal bed is established, using wet or green wood, or having too little airflow. Open your vents fully, make sure your coal bed is fully ashed over before adding wood chunks, and always use properly dried hardwood. Wait until your smoke turns thin and blue-gray before you put meat on the grate.
How do I know when to add more fuel during a long cook?
Watch your temperature, not the clock. When your cook chamber drops below 215 degrees Fahrenheit add 8 to 10 pieces of unlit lump charcoal to the edge of your existing coal bed and let them catch naturally. For an offset smoker, add a fresh split when you see your temperature dropping and there are only glowing embers remaining in the firebox. Never add fresh wood directly on top of large piles of unlit coal – add fuel gradually so your temperature stays consistent.
Can I use charcoal briquettes or do I need lump charcoal?
Both work well and many experienced pitmasters use a blend of both. Lump charcoal lights faster, burns hotter, and produces less ash. Quality briquettes burn more consistently and longer, which makes them great for maintaining stable temps on cooks over 6 hours. Avoid briquettes with self-lighting additives or chemical binders – look for brands that list only hardwood charcoal and natural starch as ingredients. Royal Oak and Kingsford Professional are solid choices widely available at most hardware stores.