So, you’ve just purchased a brand new grill and you’re itching to fire it up and start grilling some delicious meals. But before you do, there’s a crucial step that you cannot afford to skip – seasoning your grill. Seasoning your grill not only helps prevent rust and corrosion, but it also enhances the flavors of your food. In this article, we’ll guide you through the process of properly seasoning your grill, so that you can enjoy perfectly cooked meals every time. Whether you’re a seasoned grilling pro or a beginner, these tips will ensure that your grill is ready to bring out the best in your culinary creations. Get ready to transform your backyard into a haven for mouthwatering BBQ!

Why Seasoning Your Grill is Important
Seasoning your grill is an essential step that should not be overlooked. Not only does it help to improve the flavor of your food, but it also helps to protect your grill from rust and corrosion. When you season your grill, you create a non-stick surface that prevents food from sticking and makes clean-up a breeze. Whether you’re using a new grill or an old one, seasoning is a crucial step in ensuring the longevity and performance of your grill.
Choosing the Right Seasoning Method
When it comes to seasoning your grill, there are a few different methods you can choose from. Each method has its own advantages, so it’s important to consider what works best for you and your grill.
Dry Seasoning
Dry seasoning involves coating your grill grates with a layer of salt and allowing it to sit for a period of time before scraping it off. This method helps to remove any debris and build-up on the grates, leaving you with a clean and seasoned surface. Dry seasoning is a popular choice for those who prefer a simple and straightforward method.
Oil Seasoning
Oil seasoning, as the name suggests, involves applying a layer of oil to your grill grates. This method helps to create a barrier between the food and the grates, preventing sticking and promoting even cooking. Oil seasoning is a great option for those who want to add extra flavor and moisture to their food.
Flavoring Seasonings
If you want to add a kick of flavor to your grilled dishes, flavoring seasonings are the way to go. This method involves mixing your choice of herbs, spices, and seasonings and applying them to the grates. Flavoring seasonings can enhance the taste of your food, giving it an extra oomph that will have your taste buds singing.
Preparing Your Grill
Before you begin the seasoning process, it’s important to prepare your grill properly. This ensures that you have a clean slate to work with and helps to remove any rust or loose paint that may be present.
Clean Your Grill
Start by giving your grill a thorough cleaning. Remove any leftover food debris, grease, or ash that may have accumulated from previous uses. This can be done with a grill brush or scraper, along with some warm soapy water. Make sure to rinse off all the soap and allow your grill to dry completely before moving on to the next step.
Remove Rust and Loose Paint
Inspect your grill for any signs of rust or loose paint. If you notice any areas that are affected, it’s important to remove them before seasoning. Use a wire brush or sandpaper to scrub away the rust or loose paint, ensuring that you have a smooth and even surface to work with.
Dry Seasoning
If you have chosen the dry seasoning method, here are the steps you need to follow to achieve a perfectly seasoned grill.
Step 1: Gather Your Supplies
Before you start, gather all the necessary supplies. This includes a clean grill, kosher salt, and a brush or scraper.
Step 2: Preheat the Grill
Preheat your grill on high heat for 15 minutes. This will help to open up the pores of the metal grates, allowing the salt to penetrate and clean them more effectively.
Step 3: Apply the Seasoning
Sprinkle a generous amount of kosher salt over the grates. Use a brush or scraper to spread the salt evenly, ensuring that each grate is properly covered.
Step 4: Let It Sit
Allow the salt to sit on the grates for about 15-20 minutes. This will give the salt enough time to absorb any remaining moisture and loosen any debris.
Step 5: Clean the Grill
After letting the salt sit, use a brush or scraper to remove the salt and any debris that may have accumulated. Make sure to clean both the top and bottom of the grates thoroughly. Once cleaned, your grill is ready to be used.

Oil Seasoning
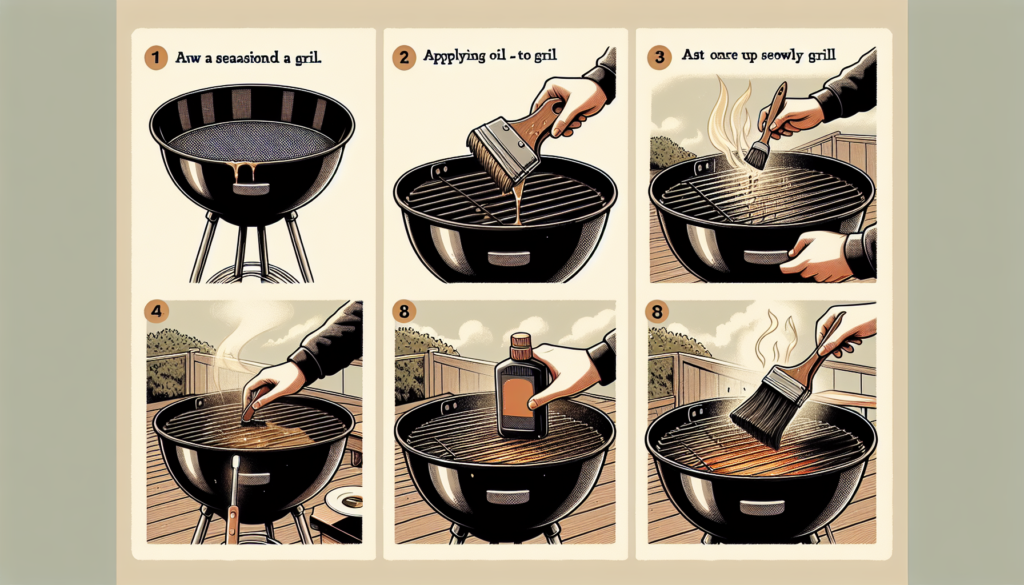
If you have opted for the oil seasoning method, follow these steps to achieve a perfectly seasoned grill.
Step 1: Choose the Right Oil
Select a high-smoke point oil, such as vegetable oil or canola oil. These oils are ideal for high-temperature cooking and will not leave a strong flavor on your food.
Step 2: Preheat the Grill
Preheat your grill on high heat for 15 minutes. This will help to open up the pores of the grates, allowing the oil to penetrate and create a non-stick surface.
Step 3: Apply the Oil
Using a clean cloth or paper towel, apply a thin layer of oil to the grates. Be sure to cover both the top and bottom surfaces of the grates.
Step 4: Let It Smoke
Allow the oil to smoke on the grates for about 15 minutes. This will indicate that the oil has bonded to the metal, creating a non-stick surface.
Step 5: Cool Down the Grill
Turn off the heat and allow the grill to cool down completely. This will prevent any injuries or accidents during the next step.
Step 6: Wipe Off Excess Oil
Once the grill has cooled down, use a clean cloth or paper towel to wipe off any excess oil. This will prevent it from pooling and causing flare-ups during cooking.
Flavoring Seasonings
If you want to add some extra flavor to your grilled dishes, follow these steps to season your grill with your favorite herbs, spices, and seasonings.
Step 1: Choose Your Flavorings
Select your desired herbs, spices, and seasonings. This can include garlic powder, onion powder, paprika, or any other combination that suits your taste.
Step 2: Mix the Seasonings
In a small bowl, mix together your chosen flavorings. Feel free to experiment with different combinations until you find your favorite blend.
Step 3: Apply to the Grill
Using a brush or your hands, apply a generous amount of the seasoning mixture to both sides of the grates. Make sure to evenly coat each grate to ensure maximum flavor.
Step 4: Let It Sit
Allow the seasoning mixture to sit on the grates for about 15-20 minutes. This will allow the flavors to penetrate the metal and infuse your food with deliciousness.
Step 5: Wipe Off Excess Seasonings
After letting the seasoning mixture sit, use a brush or scraper to remove any excess seasonings from the grates. This will prevent it from burning and affecting the taste of your food.
Maintaining a Seasoned Grill
Once you have seasoned your grill, it’s important to maintain it properly to ensure its longevity and performance.
Clean Grill After Each Use
After each use, it’s crucial to clean your grill to remove any leftover food debris or grease. This can be done with a grill brush or scraper, along with some warm soapy water. Regular cleaning will prevent the build-up of residue and keep your grill in top shape.
Monitor Seasoning Level
As you continue to use your seasoned grill, it’s important to monitor the seasoning level. Over time, the seasoning may start to wear off, especially with frequent use. If you notice any areas that are no longer seasoned, it’s time to re-apply the appropriate method to maintain the non-stick surface and prevent rust.
Repairing or Re-seasoning Your Grill
If you notice any signs of rust or peeling layers on your grill, it’s important to address them promptly to prevent further damage.
Remove and Replace Rusty or Peeling Layers
Using a wire brush or sandpaper, remove any rust or peeling layers from the affected areas. Once the damaged layers are removed, clean the area thoroughly and follow the appropriate seasoning method to re-season your grill.
Re-apply Seasoning
If your grill has experienced normal wear and tear and you notice areas that are no longer seasoned, it’s important to re-apply the appropriate seasoning method. Follow the steps outlined in the chosen method to ensure an even and thorough re-seasoning.
Additional Tips and Precautions
Here are a few additional tips and precautions to keep in mind when seasoning your grill:
Avoid Using Water to Clean a Hot Grill
Never attempt to clean a hot grill with water. The sudden temperature change can cause damage to the grill and may result in injury. Always allow your grill to cool down completely before cleaning.
Be Mindful of Allergies and Sensitivities
When choosing flavorings for your grill, be mindful of any allergies or sensitivities that you or your guests may have. Certain spices or seasonings may cause adverse reactions, so it’s important to communicate and accommodate everyone’s dietary needs.
Conclusion
Seasoning your grill is a simple yet crucial step in achieving a delicious and hassle-free grilling experience. Whether you prefer the dry seasoning, oil seasoning, or flavoring seasonings method, each offers unique benefits that will enhance the flavor of your food and protect your grill from rust and corrosion. Take the time to properly prepare and season your grill, and you’ll be rewarded with tasty and perfectly cooked meals every time. Happy grilling!
