
How to Trim Brisket Like a Pitmaster
Ingredients
Method
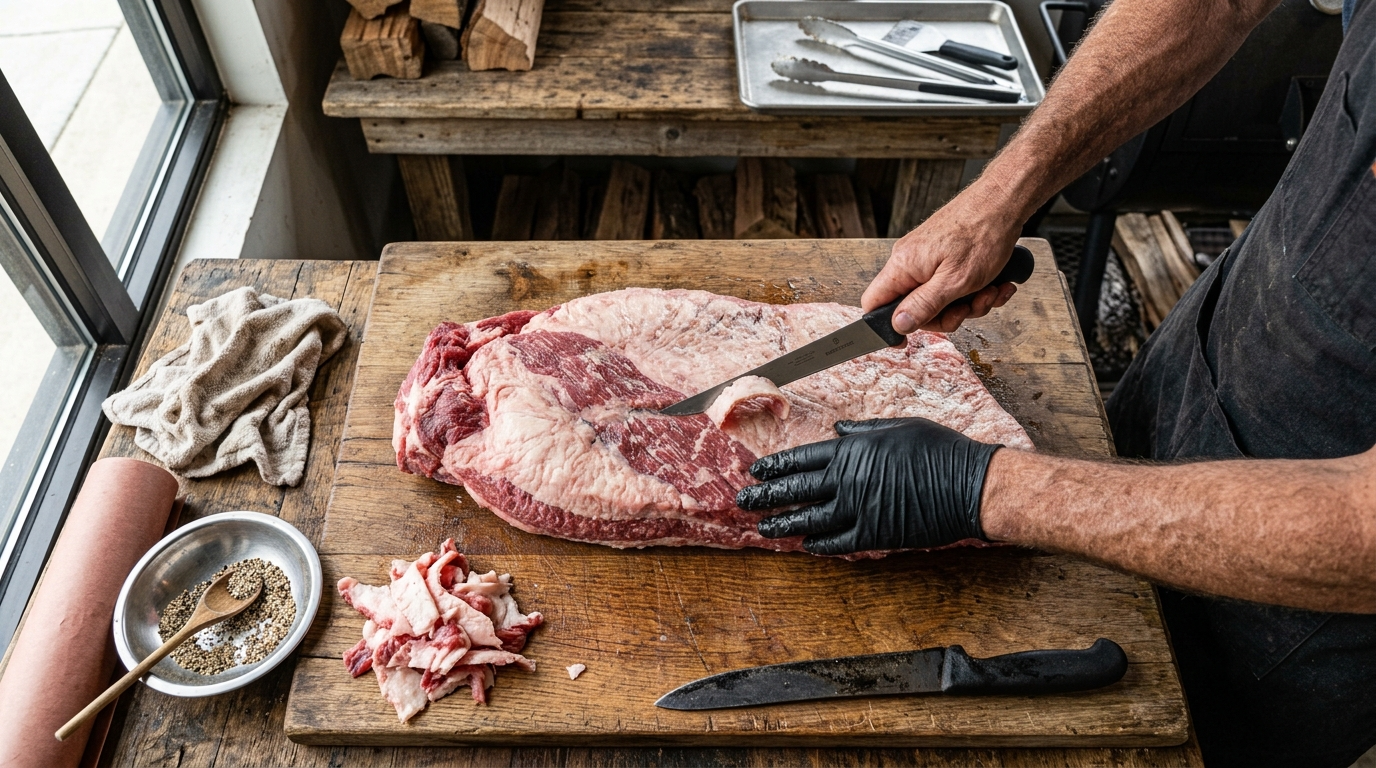
- Pull your packer brisket from the refrigerator and set it on your large cutting board fat cap side up. A cold brisket is much easier to trim than a room-temperature one because the fat firms up and holds its shape under the knife. You are looking at a two-muscle cut here: the thick, fatty point muscle sitting on top and the leaner, flatter flat muscle underneath. Take a moment to orient yourself before the first cut because understanding the grain direction and the fat seam between these two muscles will guide every decision you make with the knife.
- Flip the brisket over so the fat cap is facing down and the meat side is facing up. Locate the large, hard fat deposit on the underside of the flat near the thin end. This white, waxy hard fat does not render during the cook and will create an unpleasant texture in the finished product. Slide your boning knife under it and work it away from the meat using smooth, shallow strokes. Take your time here and do not dig into the meat itself. Remove all hard fat deposits you can see on this side of the brisket.
- Identify the silverskin, which is the thin, shiny membrane running across sections of the meat side. Silverskin does not break down during cooking and prevents rub and smoke from penetrating the meat. Angle your knife just under the edge of the silverskin, grip the flap with your free hand, and slide the blade along the surface using a gentle sawing motion to peel it away. Work in sections if needed and do not rush this step.
- Flip the brisket back over fat cap side up. This is where the most important trimming decision happens. You want to leave approximately one-quarter inch to one-half inch of fat across the entire fat cap. Too much fat and your rub cannot adhere or build bark properly. Too little fat and the flat will dry out over the course of a 12 to 18 hour cook. Hold your knife at a shallow angle and use long, sweeping strokes to shave the fat cap down evenly, working from the thin end of the flat toward the thick point.
- At the edges of the brisket where the fat cap overhangs the meat, trim the fat flush or even slightly below the meat surface. These thin flaps of fat tend to dry out and burn during the long smoke, pulling away from the meat and creating an uneven texture. Round off any sharp corners on the brisket as well. A pitmaster trick is to shape the brisket so it looks almost like a football with smooth, gradual curves rather than hard angles, which promotes even airflow and heat distribution in the smoker.
- Locate the fat seam between the point and the flat on the side of the brisket. There is often a thick pocket of soft, white fat here that you can partially excavate to allow smoke and seasoning to penetrate between the two muscles. Do not fully separate the point from the flat. Instead, use the tip of your boning knife to scoop out about half of that fat pocket, creating a channel without detaching the muscles from each other.
- Stand back and look at the trimmed brisket from every angle. You are looking for consistency in fat cap thickness, no remaining hard fat deposits, smooth curves instead of jagged cuts, and a clean meat surface free of silverskin. A well-trimmed brisket should have an almost symmetrical, aerodynamic shape. If you see any thick spots or ragged edges, now is the time to clean them up before the rub goes on.
- Apply your seasoning generously and evenly across every surface of the trimmed brisket. The classic Texas pitmaster approach is equal parts coarse kosher salt and coarse black pepper, which is known as a Dalmatian rub. Hold your hand about 12 to 18 inches above the meat and rain the seasoning down evenly so you get consistent coverage without clumping. Every inch of surface area should be coated because that rub is going to form the dark, crackling bark that makes a great brisket unforgettable.
- Wrap the seasoned brisket loosely in plastic wrap and return it to the refrigerator for a minimum of 1 hour and ideally overnight. This resting period allows the salt to penetrate the meat and start the dry-brining process, which draws moisture to the surface, dissolves the salt, and pulls it back deep into the muscle fibers. The result is more seasoned, more tender, and more flavorful meat all the way through when you finally fire up the smoker.
- When you are ready to cook, fire up your offset smoker or pellet grill to a steady 225 degrees Fahrenheit and add your wood chunks to establish clean, thin blue smoke. Pull the brisket from the refrigerator, unwrap it, and place it fat cap down if cooking on an offset where heat radiates from below, or fat cap up if your heat source is primarily from above. Insert your probe thermometer into the thickest part of the flat and settle in for the low and slow journey to 200 to 205 degrees Fahrenheit, which typically takes 1 to 1.5 hours per pound depending on your cooker.
- Spray the brisket with your apple cider vinegar and water mixture every 45 minutes to 1 hour once the bark starts to set, which usually happens in the first 4 to 5 hours. Do not open the cooker before that point or you will disrupt temperature stability and lose precious smoke time. When the internal temp stalls between 155 and 170 degrees Fahrenheit, wrap the brisket tightly in two layers of pink butcher paper to push through the stall while preserving the bark texture you worked so hard to build.
- Continue cooking the wrapped brisket until the internal temp reaches 200 to 205 degrees Fahrenheit and a probe or thermometer skewer slides into the thickest part of the flat with zero resistance, like it is going into warm butter. This is the moment every pitmaster waits for. Pull the brisket from the cooker, keep it wrapped, and rest the meat in a dry cooler lined with old towels for a minimum of 1 hour and ideally 2 to 3 hours. This resting period is non-negotiable. It allows the muscle fibers to relax and reabsorb the juices that have been pushed to the center of the meat during the cook.
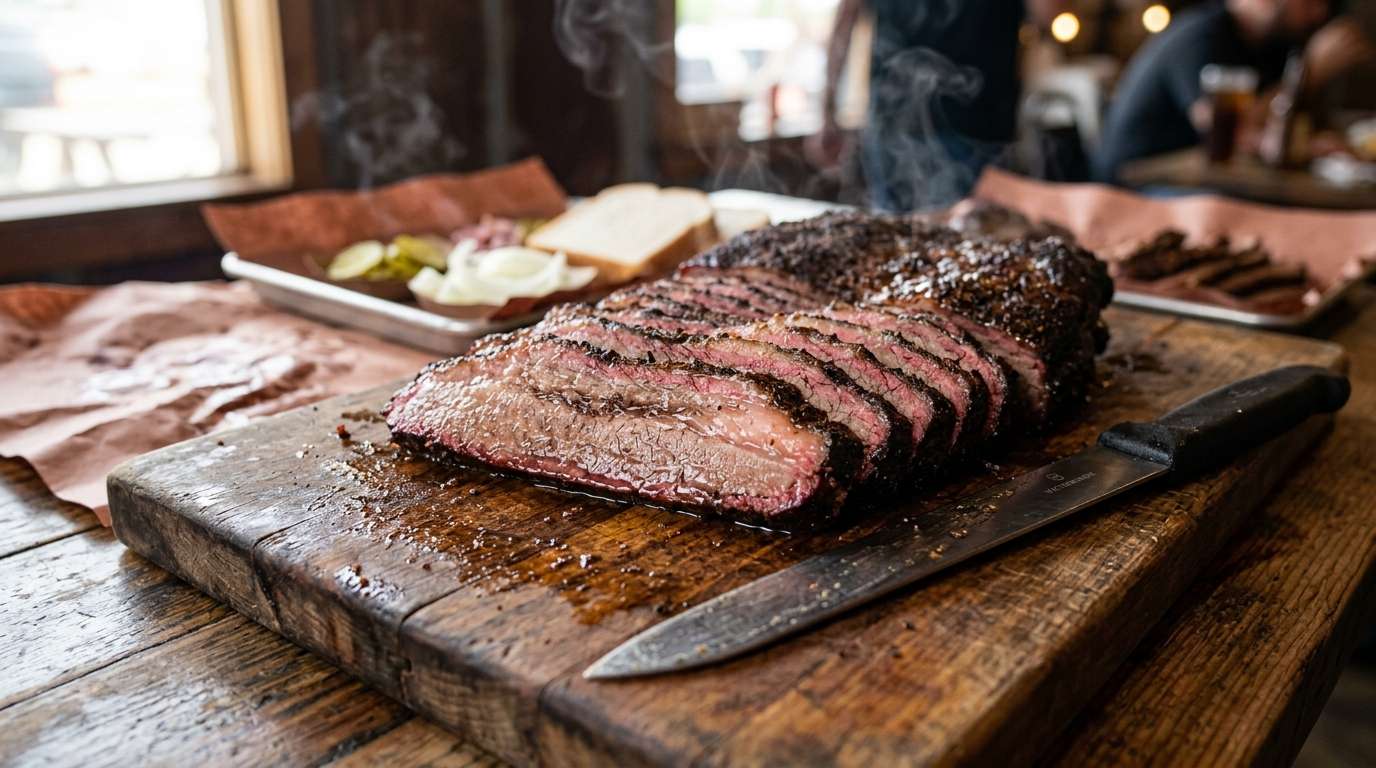
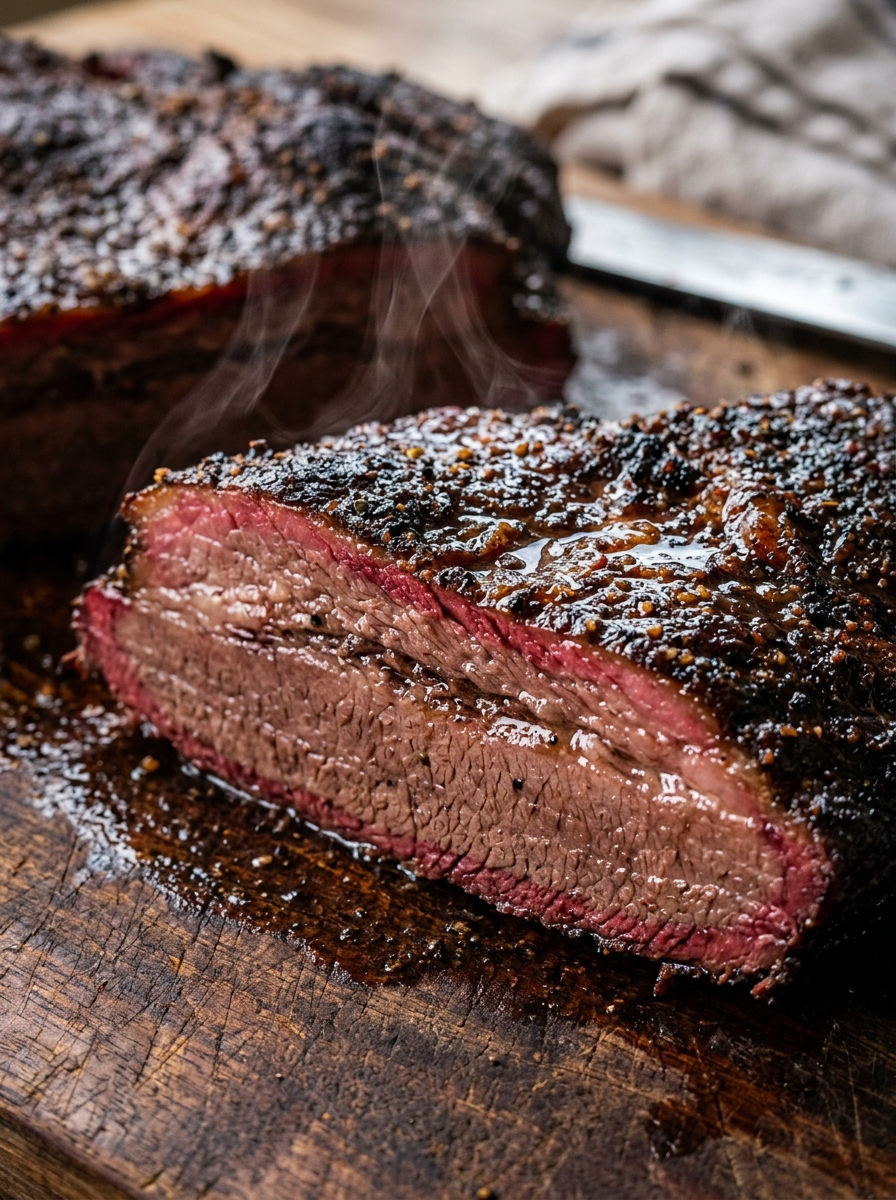
- After the rest, unwrap the brisket on your cutting board and marvel at the dark mahogany bark and the smoke ring running around the perimeter of the flat. Separate the point from the flat by cutting through the fat seam if desired, or slice them together. Always slice brisket against the grain, which runs in different directions on the point and the flat, so pay attention as you work from one end to the other. Cut slices about the thickness of a pencil, approximately one-quarter inch, for the flat, and go slightly thicker on the fatty, tender point. Serve immediately and let the work speak for itself.
Nutrition
Learning how to trim brisket is the fundamental skill that separates a pitmaster from a backyard cook who just throws meat on the smoker and hopes for the best. The way you manage the fat cap, remove the silverskin, and shape that full packer brisket before it ever sees smoke will determine whether you end up with a jaw-dropping bark, a clean smoke ring, and melt-in-your-mouth slices, or a greasy, uneven cook that leaves everyone at the table politely reaching for more sauce. This is where championship BBQ is won or lost, right there on the cutting board before you fire up the smoker.
A full packer brisket is a two-muscle cut weighing anywhere from 12 to 18 pounds, consisting of the lean flat and the fatty, marbled point. These two muscles cook at different rates and require strategic fat management to reach that magic internal temp of 200 to 205 degrees Fahrenheit simultaneously. Leave too much fat and you get a greasy, undercooked layer sitting between your rub and the meat. Trim too aggressively and the flat will dry out over the course of a 12 to 15 hour low and slow cook, leaving you with a tough, chalky result that no amount of BBQ sauce can fix. The goal is a uniform one-quarter inch to one-half inch fat cap that protects the meat, renders slowly into the muscle, and gives your rub the surface it needs to form that legendary mahogany crust.
At GrillMasterHQ, we have spent years dialing in this technique by studying what the best pitmasters in Texas, Kansas City, and the competition circuit do differently from everyone else. The answer almost always starts with the trim. This guide will walk you through every cut, every decision, and every pitmaster trick you need to transform a raw packer brisket into the perfectly shaped, beautifully seasoned canvas that leads to the best smoked brisket you have ever pulled off a cooker.
How to Trim Brisket Like a Pitmaster
Learning how to trim brisket is the single most important skill standing between you and competition-worthy BBQ. A proper trim means better bark, better smoke penetration, and a more even cook from flat to point. Fire up the smoker because brisket season never ends.
Ingredients
| AMOUNT | INGREDIENT | NOTES |
|---|---|---|
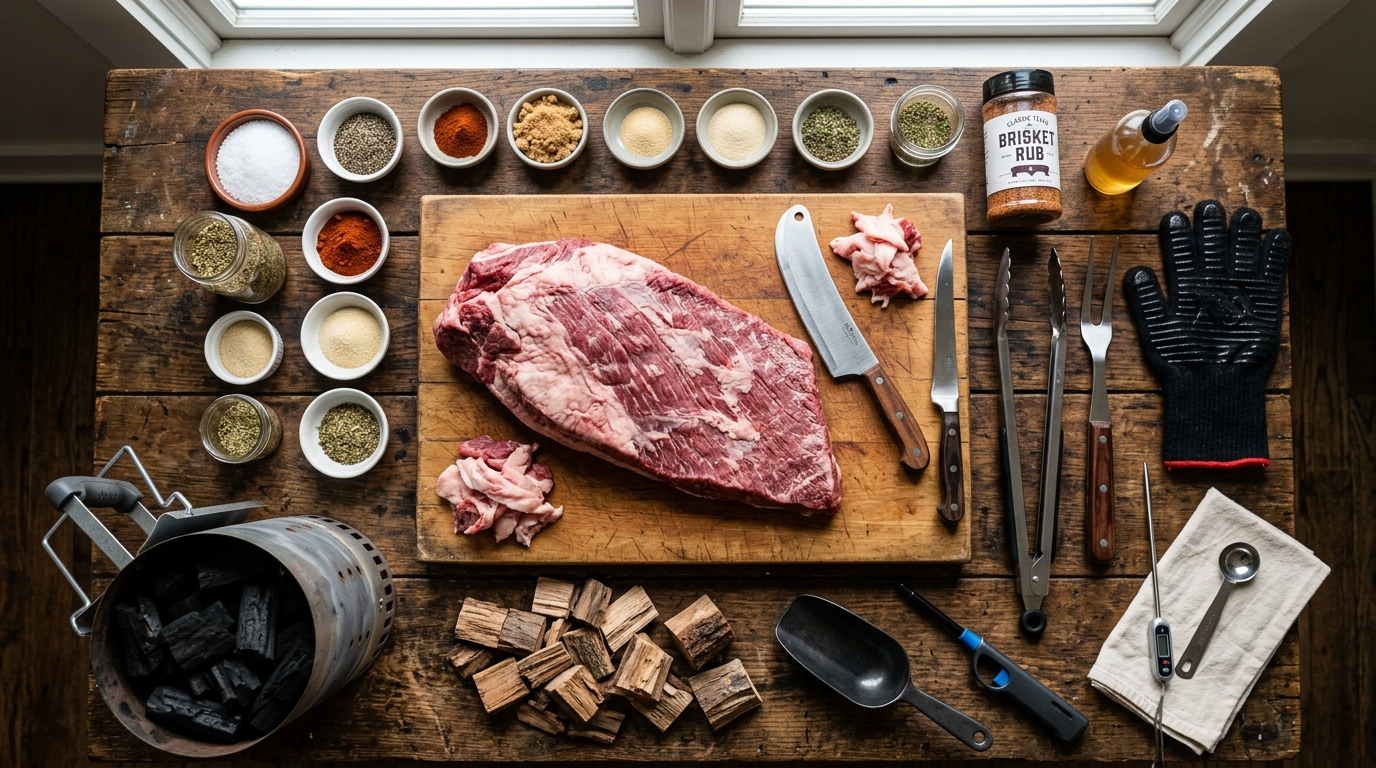
| 1 whole | packer brisket | 12 to 16 pounds, USDA Choice or Prime grade for best marbling and tenderness |
| 1 cup | coarse kosher salt | Diamond Crystal brand preferred by most competition pitmasters |
| 1 cup | coarse black pepper | 16-mesh or coarser for classic Texas bark formation |
| 2 tablespoons | garlic powder | optional, adds depth without overpowering the beef |
| 2 tablespoons | smoked paprika | optional, enhances color and adds subtle smokiness to the rub |
| 1 cup | apple cider vinegar | mixed 50-50 with water in a spray bottle for mopping during the cook |
| 6 to 8 chunks | post oak or hickory wood | fist-sized chunks for sustained smoke production during the low and slow cook |
Instructions
Nutrition (per serving)
The BBQ Story Behind This Recipe
Brisket has been the centerpiece of Texas BBQ culture since the mid-1800s when cattle drives and meatpacking operations made this tough, inexpensive cut widely available across the state. German and Czech immigrant butchers in Central Texas towns like Lockhart, Taylor, and Luling began smoking unsold brisket over local post oak wood as a preservation method, selling the finished product by the pound wrapped in butcher paper with no utensils and no apology. What started as a practical solution to reducing meat waste became a cultural cornerstone that eventually spawned legendary establishments like Kreuz Market, Black is BBQ, and Franklin Barbecue, which consistently draws lines around the block and has been called the best BBQ in America by just about every food publication that exists. The trimming technique was passed down informally from pit worker to pit worker, with each generation adding their own refinements to fat management, knife technique, and overall brisket geometry.
As competitive BBQ grew into a national phenomenon through organizations like the Kansas City Barbeque Society and the Memphis in May World Championship, brisket trimming evolved from a simple butchering task into a precision craft. Competition teams began studying the physics of airflow, fat rendering rates, and bark formation, realizing that a well-trimmed brisket with smooth curves and consistent fat coverage cooked more evenly and scored higher with judges who were evaluating appearance, texture, and taste as separate categories. Pitmasters like Aaron Franklin, who detailed his trim and cook philosophy in the book Franklin Barbecue: A Meat-Smoking Manifesto, brought this competitive knowledge into the mainstream and inspired an entire generation of backyard cooks to stop guessing and start treating the trim as the critical first step in a long, intentional cooking process that always rewards patience and precision.
Hot Off the Grill
A Closer Look
Pitmaster Tips for Best Results
- Always trim your brisket cold, straight from the refrigerator. Cold fat at around 35 to 40 degrees Fahrenheit is firm and easy to slice evenly. Room temperature fat compresses under the knife and leads to uneven cuts that are hard to correct.
- Save all of your brisket trimmings in a zip lock bag in the freezer. Rendered brisket fat can be used to season cast iron, cook eggs, saute vegetables, or mix into ground beef burgers for an incredible flavor boost. Never waste what the brisket gives you.
- A sharp knife is safer and more effective than a dull one. Before every trim session, run your boning knife through a honing steel at least 10 strokes per side. A blade that slides through fat without dragging means cleaner cuts and less frustration.
- The one-quarter inch fat cap rule is your baseline but adjust based on your cooker. Offset smokers with high radiant heat from the firebox may benefit from a slightly thicker fat cap on the side facing the firebox to protect the meat during the cook.
- Do not be afraid of the trim pile. A properly trimmed full packer brisket can produce 2 to 4 pounds of trimmings and that is completely normal. Many competition pitmasters trim aggressively and accept the yield loss because a cleaner brisket gives them more control over the final product in terms of bark formation and cook consistency.
🔧 Pitmaster Equipment
Sharp 6-Inch to 9-Inch Boning Knife: A sharp, flexible boning knife is the single most important tool in the brisket trim. The flexible blade lets you navigate the fat cap and seam between the point and flat without tearing the meat or making choppy, uneven cuts.
Large Cutting Board: A full packer brisket needs room to move. A wide, stable cutting board at least 18 by 24 inches keeps the meat secure while you work through the trim safely from every angle.
Nitrile Gloves: Cold brisket fat is slippery and a boning knife is unforgiving. Nitrile gloves give you a firm grip on the meat and keep your hands clean during the trim process.
Honing Steel: A sharp knife is a safe knife. Run your boning knife through a honing steel for at least 10 strokes per side before every trim session to maintain the edge and keep your cuts clean and controlled.
Offset Smoker or Pellet Grill: You need a cooker capable of holding a steady 225 to 250 degrees Fahrenheit for the entire low and slow cook, which can run 12 to 18 hours for a full packer brisket. Consistent temperature is everything.
Wireless Probe Thermometer: Monitoring the internal temp of the flat without opening the cooker is critical to maintaining temperature stability during the long cook. A dual-probe wireless unit lets you track both the meat temp and the cooker temp simultaneously.
Pink Butcher Paper: Wrapping the brisket in pink butcher paper when it hits the stall between 155 and 170 degrees Fahrenheit helps push through the stall while allowing the bark to breathe and stay crisp, unlike foil which traps steam and softens the bark.
🔥 Variations
Pellet Grill Version: Set your pellet grill to 225 degrees Fahrenheit using hickory, oak, or a competition blend of pellets. Follow the same trim and seasoning steps, place the brisket fat cap up to let the fat baste the meat as it renders, and monitor the internal temp with a wireless probe thermometer. Wrap in butcher paper at the stall around 160 to 165 degrees Fahrenheit and finish to 203 degrees Fahrenheit. Rest the meat for at least 2 hours before slicing.
Gas Grill Version: Set up your gas grill for indirect heat by lighting only the outer burners and leaving the center burners off. Target 225 to 250 degrees Fahrenheit inside the lid with the thermometer. Place a smoker box filled with soaked hickory or oak chips directly over a lit burner and position the trimmed brisket in the center, away from direct heat. Replenish the wood chips every 45 minutes for the first 4 hours to build your smoke ring, then wrap and finish as directed.
Competition Style Trim: For KCBS or other competition circuits, take the trim one step further by injecting the flat with a beef broth and phosphate-based injection before seasoning. Competition pitmasters also tend to separate the point from the flat completely, trim the point aggressively to a uniform shape, and re-stack them before cooking or cook them separately to give the judge a perfect burnt end alongside a uniform flat slice.
Central Texas Minimal Trim: The old-school Central Texas approach favors a thicker fat cap of around one-half inch left intact and a much more hands-off philosophy overall. Less trimming, less intervention, just salt, pepper, and post oak smoke for 12 to 18 hours at 225 degrees Fahrenheit. This method relies on the quality of the beef and the integrity of the smoke to carry the day, with the fat cap protecting the flat and rendering into the meat throughout the long cook.
❓ Pitmaster FAQ
How much fat should I leave on the brisket fat cap?
The golden rule is one-quarter inch to one-half inch of fat cap remaining after trimming. Less than one-quarter inch and the flat will dry out during a long low and slow cook. More than one-half inch and the rub cannot adhere properly, which means you sacrifice bark development and smoke penetration on that surface.
What type of knife is best for trimming brisket?
A sharp 6-inch to 9-inch flexible boning knife is the preferred tool for most pitmasters. The flex in the blade lets you follow the contours of the fat cap and navigate around the fat seam between the point and flat without tearing the meat. A rigid knife will work but requires more deliberate technique on curved surfaces.
Should I trim brisket the night before or right before cooking?
Trimming the night before is actually ideal. Trim the brisket cold, apply your rub, wrap it loosely, and let it rest in the refrigerator overnight. This dry-brine process lets the salt penetrate deep into the meat and the rub has time to adhere properly before the brisket goes into the smoker the next morning.
What internal temperature should a brisket reach?
Target an internal temperature of 200 to 205 degrees Fahrenheit measured in the thickest part of the flat. More important than the number is the probe test: your thermometer or a wooden skewer should slide into the meat with zero resistance when the brisket is truly done. A brisket that reads 200 degrees but still feels tight needs more time.
Can I trim a brisket flat instead of a full packer brisket?
Yes, trimming a brisket flat follows the same principles but with less work since the point muscle is already removed. Focus on removing hard fat deposits, silverskin, and squaring off the edges for even cooking. Just be aware that flats are more prone to drying out without the protective fat of the point, so do not trim the fat cap below one-quarter inch on a flat cut.
What should I do with the brisket trimmings?
Never throw away brisket trimmings. Freeze them in a zip lock bag and use the rendered fat to cook with later. You can also render the trimmings down in a cast iron skillet over low heat, strain the liquid fat, and store it in the refrigerator for months. Brisket tallow is incredible for cooking potatoes, sauteing mushrooms, or finishing sliced brisket for an extra hit of beefy richness.