
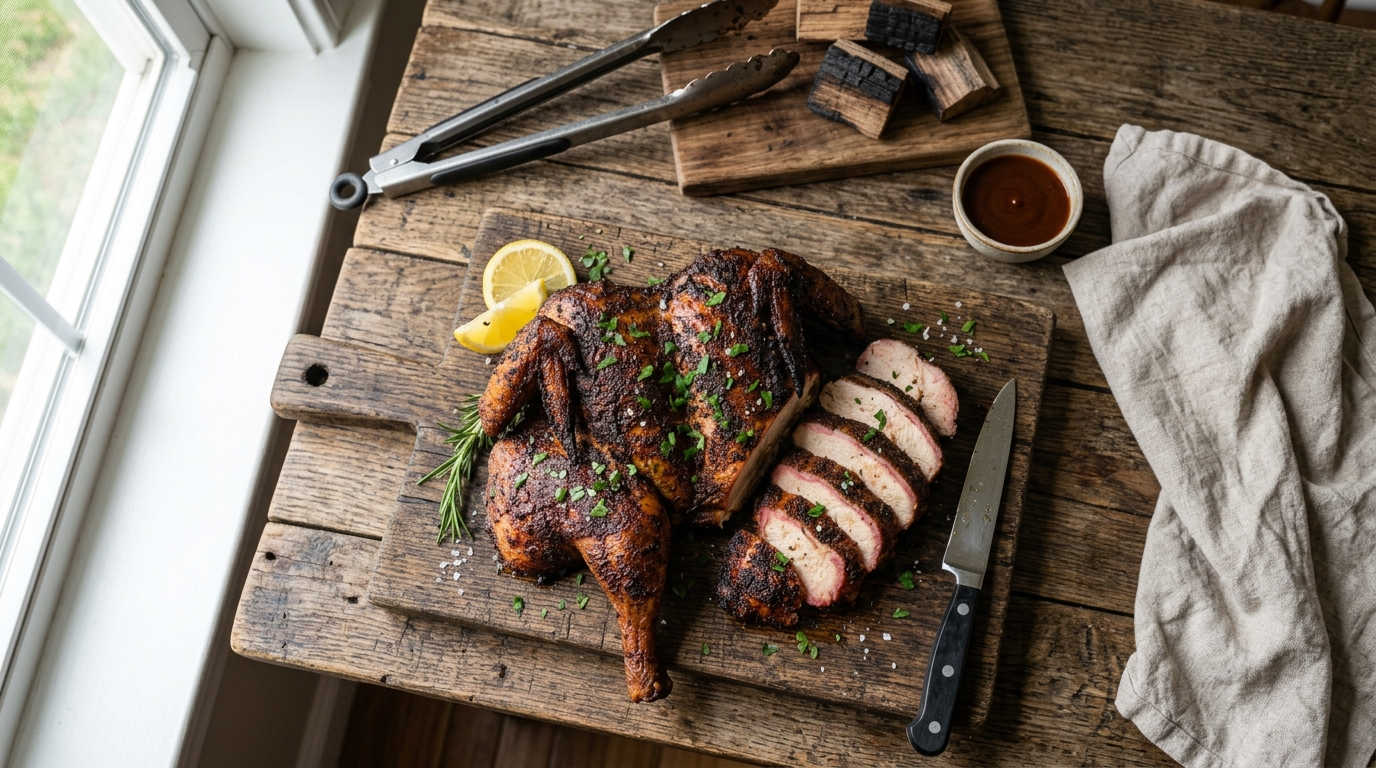
Spatchcock Smoked Chicken Recipe: Crispy & Juicy
Ingredients
Method
- SPATCHCOCK THE CHICKEN - Place your whole chicken breast-side down on a sturdy cutting board. Using sharp kitchen shears, cut firmly along both sides of the backbone from the tail end straight up to the neck cavity. Remove and discard the backbone - or save it for stock. Flip the bird breast-side up and press down firmly with the heel of both hands directly on the breastbone until you hear and feel it crack flat. The bird should now lay completely flat. Pat it thoroughly dry with paper towels - this step is non-negotiable for getting crispy skin.
- DRY BRINE OVERNIGHT (HIGHLY RECOMMENDED) - Sprinkle 2 teaspoons of kosher salt evenly over every surface of the spatchcocked chicken including under the breast skin if you can gently separate it. Place the bird uncovered on a wire rack set over a sheet pan and refrigerate for 8 to 24 hours. This dry brine draws out surface moisture, seasons the meat deeply, and allows the skin to dry out in the refrigerator so it crisps dramatically better during the cook. If you are short on time, even 1 hour of uncovered air drying in the fridge makes a meaningful difference.
- BUILD YOUR FIRE AND SET UP TWO-ZONE HEAT - About 45 minutes before cook time, fire up your charcoal grill or smoker. For a kettle grill, bank a full chimney of lit charcoal to one side of the grill to create a two-zone setup - direct high heat on one side and an empty indirect zone on the other. Place an aluminum drip pan filled halfway with water on the indirect side directly on the charcoal grate. Bring the indirect zone temperature to a steady 225 to 250 degrees Fahrenheit measured at grate level. Add 2 to 3 cherry or applewood chunks directly to the hot coals just before the bird goes on.
- SEASON THE BIRD - Remove the chicken from the refrigerator 30 minutes before it goes on the smoker to take the chill off the surface. In a small bowl, combine the smoked paprika, garlic powder, onion powder, black pepper, brown sugar, dried oregano, and cayenne. Drizzle the oil over every surface of the chicken and rub it in evenly so the skin is lightly coated. If using butter, slide small pats under the breast skin directly against the meat. Apply the spice rub generously over the entire surface of the bird - top, bottom, under the skin where accessible. Press it in firmly so it adheres well.
- LOW AND SLOW SMOKING PHASE - Place the spatchcocked chicken skin-side up on the indirect side of your grill over the drip pan. Do not place it over direct heat. Close the lid and maintain a cooking temperature of 225 to 250 degrees Fahrenheit. Let the bird smoke low and slow for 60 to 90 minutes without opening the lid any more than necessary. You are looking for the wood smoke to penetrate the meat and develop that beautiful pink smoke ring just under the skin. Replenish coals as needed to maintain temp. The skin will look pale and rubbery at this stage - that is perfectly normal and expected.
- MONITOR INTERNAL TEMP AND WATCH THE BARK - At the 60-minute mark, insert your instant read thermometer into the thickest part of the breast without touching bone. You are checking progress - you want the breast to reach about 140 to 145 degrees Fahrenheit before moving to the finishing phase. You should also be seeing the rub start to set into a darkening, tacky surface that will become your bark. If you are running a charcoal setup and your temps have dropped, add a small handful of fresh lit coals to bring it back to 225 to 250 degrees.
- HIGH HEAT FINISHING PHASE - Once the breast reads 145 to 150 degrees Fahrenheit internally, it is time to crank up the heat to finish and crisp the skin. On a charcoal kettle, add more lit coals and open the vents fully to bring the temperature up to 375 to 400 degrees Fahrenheit. On an offset or kamado, dial in the vents to climb to that same 375-degree range. Keep the chicken on the indirect side but the increased ambient heat will blast that skin into a deep golden, mahogany, crackling finish over the next 20 to 30 minutes. Watch it carefully at this stage.
- PULL AT PERFECT INTERNAL TEMP - Check the internal temperature frequently during the finishing phase. Insert your instant read thermometer into the thickest part of the breast avoiding the bone. Pull the chicken off the smoker when the breast reads 160 degrees Fahrenheit - carryover cooking will bring it up to the USDA safe temperature of 165 degrees Fahrenheit while it rests. Also check the thigh - it should read at least 170 to 175 degrees Fahrenheit for best texture in the dark meat. If the thigh is not there yet but the breast is at 160, tent loosely with foil and give it another 5 to 10 minutes.
- REST THE MEAT - This step is not optional. Transfer the finished spatchcock smoked chicken to a clean cutting board and tent it loosely with aluminum foil. Rest the meat for a full 10 to 15 minutes before carving. Resting allows the muscle fibers to relax and reabsorb the juices that have been pushed to the center during cooking. Cut into it too soon and you will see all those precious juices run out onto the cutting board. Use those 15 minutes to set up your sides and grab a cold drink - you earned it.
- CARVE AND SERVE - Remove the foil and take a moment to admire that bark, that smoke ring, and the deep color on that skin - you did that. To carve, use a sharp chef knife to cut straight down the center of the breast to split the bird in half. Then separate each leg and thigh from the breast half by cutting through the joint. You now have four generous portions - two breast halves and two leg-thigh quarters. Serve immediately while the skin is still crackling and the meat is steaming hot. This is peak backyard BBQ right here.
Nutrition
This spatchcock smoked chicken recipe is hands down one of the most rewarding cooks you will ever fire up the grill for – flat-butterflied chicken that cooks faster, more evenly, and with more surface area exposed to that beautiful wood smoke than any whole bird trussed up in a pan. We are talking a gorgeous mahogany bark on the skin, a pink smoke ring running deep into the breast meat, and thighs so juicy they practically fall off the bone. We run this cook at 225 degrees Fahrenheit for the first 90 minutes to let the smoke do its work, then we crank the heat up to 375 degrees to finish and crisp that skin to shatteringly perfect texture. The internal temp you are chasing is 165 degrees Fahrenheit in the thickest part of the breast, but pull it at 160 and let carryover heat do the rest while you rest the meat.
Spatchcocking – also called butterflying – is the single best modification you can make to your whole chicken game. By removing the backbone and pressing the bird flat, you eliminate the age-old problem of overcooked breast meat by the time the dark meat catches up. Now both halves of the bird sit at the same level above the heat source, and the skin on every single surface faces upward toward that convective heat that makes it crisp and lacquered. Combined with the low and slow smoking phase, you get a bird that eats like it came out of a serious BBQ joint but only took about two and a half hours start to finish.
At GrillMasterHQ we have smoked hundreds of chickens over the years on everything from offset smokers to kettle grills to pellet rigs, and this spatchcock method wins every single time. The rub we use here leans into savory, smoky, and just a hint of sweet – the kind of balance that lets the wood smoke flavor come through rather than drown it out. We favor cherry or applewood for poultry because they produce a clean, mild smoke that does not overwhelm the delicate meat. Hickory works too if you want a more assertive smoke presence. Get your wood chunks soaking, mix up that rub, and let us get into it.
Spatchcock Smoked Chicken Recipe: Crispy & Juicy
This spatchcock smoked chicken recipe delivers impossibly crispy skin, a deep mahogany smoke ring, and fall-apart juicy meat in nearly half the time of a whole bird. Low and slow smoke plus high-heat finishing makes this the ultimate backyard showstopper. Fire up the grill today and taste the difference.
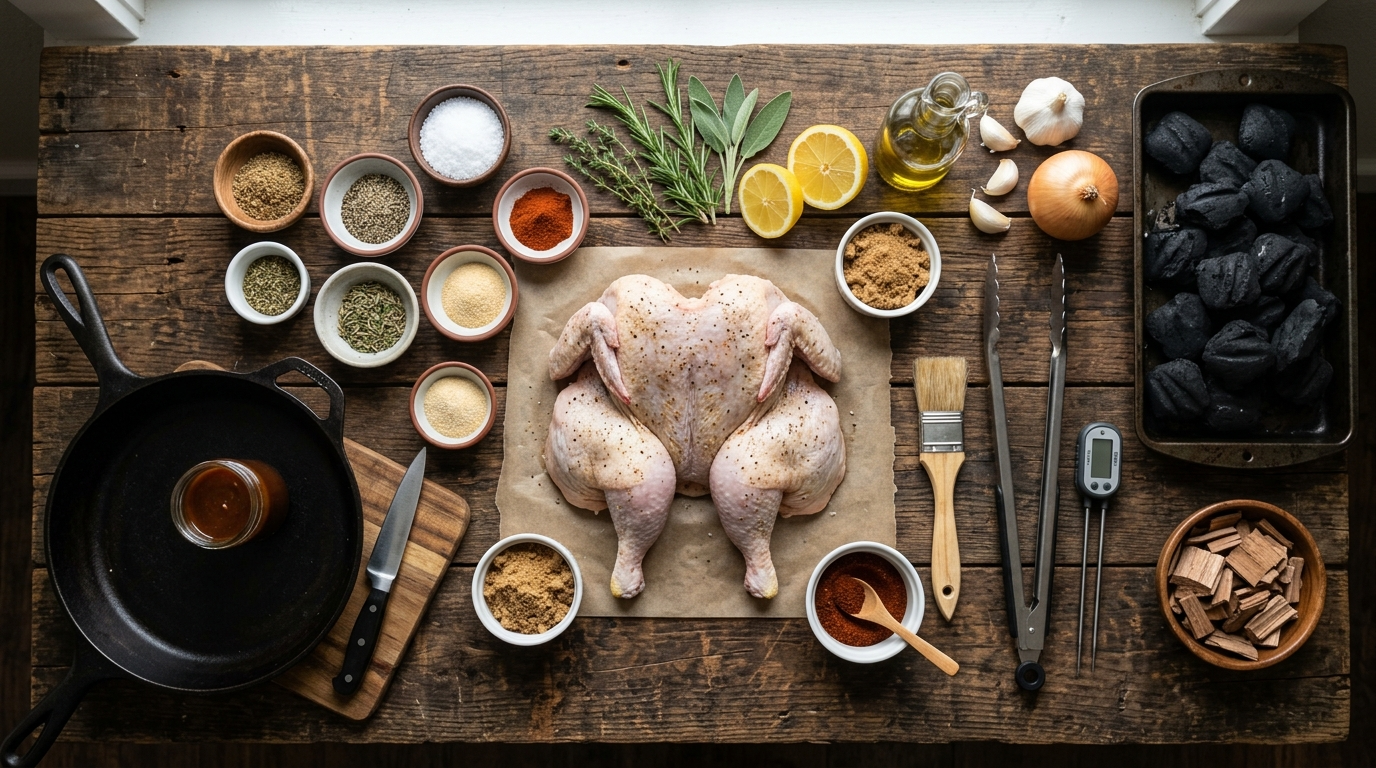
Ingredients
| AMOUNT | INGREDIENT | NOTES |
|---|---|---|
| 1 whole | chicken | 3.5 to 4.5 lbs, spatchcocked with backbone removed |
| 2 tablespoons | olive oil or avocado oil | for coating the bird before applying rub |
| 2 teaspoons | kosher salt | for dry brine applied night before if time allows |
| 2 teaspoons | smoked paprika | adds color and deepens the BBQ flavor profile |
| 1 teaspoon | garlic powder | use granulated garlic for better bark adhesion |
| 1 teaspoon | onion powder | adds savory depth to the rub |
| 1 teaspoon | black pepper | freshly cracked for best flavor |
| 1 teaspoon | brown sugar | light brown sugar helps develop bark and balances the savory spices |
| 0.5 teaspoon | dried oregano | optional but adds an herbal note that pairs well with fruitwood smoke |
| 0.5 teaspoon | cayenne pepper | optional – adjust to your heat preference |
| 2-3 chunks | cherry or applewood | fist-sized chunks for smoking – soaked 30 minutes if using charcoal |
| 1 tablespoon | unsalted butter | optional – slide pats under the breast skin before smoking for extra richness |
Instructions

Nutrition (per serving)
The BBQ Story Behind This Recipe
Spatchcocking poultry is a technique with roots stretching back centuries across European and African cooking traditions. The word itself is believed to derive from an old Irish phrase relating to dispatching a bird quickly for cooking – a practical method used by cooks who needed to get a whole bird over a fire fast without the luxury of a roasting oven or hours to spare. In colonial American cooking, butterflied birds were a common sight laid over open hearths and outdoor fire pits, and the technique spread naturally into the Southern BBQ tradition where whole hog and low-and-slow smoking culture was already deeply embedded in everyday life.
In the American BBQ canon, smoked whole chicken has always played a supporting role to the big stars – brisket, pork ribs, pulled pork – but pitmasters from Texas to the Carolinas have long known that a properly smoked chicken is one of the most satisfying and efficient cooks you can run on a smoker. Poultry absorbs smoke beautifully and cooks in a fraction of the time of larger cuts, making it the perfect option for weeknight cooks and backyard competitions alike. The combination of the spatchcock technique with wood-fired smoking is a more modern refinement – popularized in the last two decades as backyard pitmasters began merging classical grilling techniques with traditional low-and-slow methodology. Today it is a staple on the competition BBQ circuit and a weekend ritual for serious backyard cooks across the country.
Hot Off the Grill

A Closer Look

Pitmaster Tips for Best Results
- Dry brining overnight is the single biggest upgrade you can make to this recipe. Salt applied 12 to 24 hours ahead seasons the meat all the way through and dries the skin dramatically, giving you that crackling texture that makes everyone at the table go quiet.
- Keep your smoker temperature steady between 225 and 250 degrees Fahrenheit during the low-and-slow phase. Temperature spikes above 275 during smoking will render the fat too fast and you will lose the opportunity for deep smoke penetration and a defined smoke ring.
- Cherry or applewood are ideal for poultry because their smoke is mild and slightly sweet. If you want a bolder smoke flavor, blend one chunk of hickory with one chunk of cherry. Avoid mesquite on chicken – it is too aggressive and can turn bitter over a long cook.
- Sliding butter pats under the breast skin before the cook is a game-changing move. As the fat renders it bastes the breast meat from the inside, adding richness and acting as an insurance policy against any dryness if you push slightly past your target internal temp.
- If you want competition-level skin, do not sauce the chicken during the smoking phase. Apply any BBQ glaze or sauce only in the last 10 minutes of the high-heat finishing phase. Saucing too early burns the sugars, creates a sticky mess, and prevents the skin from crisping properly.
🔧 Pitmaster Equipment
Charcoal Kettle Grill or Offset Smoker: Provides the authentic wood smoke environment and two-zone heat setup needed for both the low-and-slow smoking phase and the high-heat finishing phase.
Instant Read Thermometer: Absolutely critical for nailing the safe internal temp of 165 degrees Fahrenheit in the breast without overcooking the thighs. Do not skip this tool.
Sharp Kitchen Shears or Poultry Shears: The right tool for cutting out the backbone cleanly and efficiently when preparing your spatchcock cut.
Long BBQ Tongs: Keep your hands safely away from the fire when managing the chicken, adjusting coals, and moving the bird between heat zones.
Wire Rack over Sheet Pan: Essential for dry brining the chicken uncovered in the refrigerator overnight so the skin dries out and crisps up beautifully during the cook.
Wood Chunks – Cherry or Applewood: Mild fruitwoods produce clean, sweet smoke that complements poultry without overwhelming it. Two to three fist-sized chunks is all you need.
Aluminum Drip Pan: Placed under the chicken on the indirect side to catch drippings and add moisture to the cooking environment.
🔥 Variations
Pellet Grill Version: Set your pellet grill to 225 degrees Fahrenheit with cherry or applewood pellets and follow the same smoking phase timeline. When the breast hits 145 to 150 degrees, ramp the pellet grill up to 375 to 400 degrees Fahrenheit and finish to 160 degrees in the breast. Pellet grills excel at maintaining consistent temps, making this cook very approachable for beginners.
Gas Grill Version: Use indirect heat by turning on only the outer burners and leaving the center burners off. Target 225 to 250 degrees Fahrenheit in the indirect zone. Place a smoker box filled with soaked cherry or applewood chips directly over a lit burner. Follow the same cook steps and finishing phase by cranking all burners to high for the last 20 minutes to crisp the skin.
Spicy Honey Glazed Variation: In the last 10 minutes of the finishing phase, brush the bird with a mixture of 3 tablespoons of hot honey and 1 tablespoon of apple cider vinegar. The sugars will caramelize into a glossy, sticky, sweet-heat glaze that is absolutely stunning over that smoky bark. Add a pinch of red pepper flakes to the glaze for extra heat.
Alabama White Sauce Version: Skip the glaze and serve this bird sliced over a pool of Alabama white sauce – a tangy, creamy mayonnaise-based BBQ sauce from northern Alabama made with mayo, apple cider vinegar, horseradish, and black pepper. The acidity of the white sauce cuts through the richness of the smoked skin perfectly and is a regional BBQ tradition worth exploring.
Herb and Lemon Spatchcock: Replace the spice rub with a mixture of fresh rosemary, thyme, lemon zest, garlic, olive oil, salt, and pepper. Smoke with applewood and finish at high heat as normal. The herbaceous, citrus-forward profile pairs beautifully with the mild applewood smoke and makes for a more European-leaning presentation.
❓ Pitmaster FAQ
What internal temperature should spatchcock smoked chicken reach?
Pull the chicken off the smoker when the thickest part of the breast reads 160 degrees Fahrenheit on your instant read thermometer. Carryover cooking during the rest period will bring it up to the USDA-recommended safe internal temperature of 165 degrees Fahrenheit. The thighs should read at least 170 to 175 degrees for the best texture in the dark meat.
How long does it take to smoke a spatchcock chicken?
At 225 to 250 degrees Fahrenheit for the smoking phase followed by a 375-degree finishing phase, a 3.5 to 4.5 lb spatchcocked chicken typically takes 2 to 2.5 hours total. The flat shape cooks significantly faster than a whole trussed bird, which is one of the biggest practical advantages of the spatchcock method.
Can I use a gas grill instead of a charcoal grill or smoker?
Absolutely. Set up your gas grill for indirect heat by turning on only the outer burners and leaving the center burners off. Aim for 225 to 250 degrees Fahrenheit in the indirect zone. Place a smoker box loaded with soaked cherry or applewood chips over one of the lit burners to generate smoke. Follow the same cook steps and ramp up the heat at the end to crisp the skin.
What wood is best for smoking chicken?
Cherry and applewood are the top choices for smoking chicken because they produce a mild, slightly sweet smoke that complements the delicate flavor of the poultry without overwhelming it. Peach wood is another excellent fruitwood option. If you want a bolder smoke, blend one chunk of hickory with one chunk of cherry. Avoid mesquite for chicken as it tends to become bitter and astringent over extended cooks.
Do I have to dry brine the chicken overnight?
You do not have to, but you absolutely should if time allows. Dry brining for 8 to 24 hours seasons the meat deeply, dries out the skin so it crisps better, and improves the overall texture of the finished bird noticeably. If you are pressed for time, even 1 to 2 hours of uncovered air drying in the refrigerator after applying the salt will make a meaningful improvement over cooking it immediately after seasoning.
Why is my smoked chicken skin rubbery instead of crispy?
Rubbery skin is one of the most common low-and-slow smoking problems with poultry and it comes down to moisture and temperature. To get crispy skin you need to dry the skin thoroughly before cooking, smoke at a steady temperature without excess moisture in the cooking environment, and always finish the bird at a higher heat of 375 to 400 degrees Fahrenheit to render the fat and crisp the skin. Skipping the dry brine, smoking with a water pan too close to the bird, or never cranking the heat at the end are the usual culprits.