Knowing how to baste ribs on grill is the single skill that separates a decent rack of ribs from a show-stopping, competition-worthy slab that has your guests begging for the recipe. Basting is not just slapping on sauce at the end of the cook. It is a deliberate, timed process of building layer upon layer of flavor directly onto the meat while heat and smoke do their magic. When you nail this technique, you end up with ribs that have a deep mahogany bark, a glistening lacquered crust, and juice that runs down your arm with every bite.
The key to great basting starts long before the sauce even comes out. You want your ribs holding steady at 225 to 250 degrees Fahrenheit on the grill or smoker for the first two to two and a half hours before you apply a single drop of liquid. During that initial phase, a crust starts forming on the surface of the meat, the smoke ring develops, and the fat begins rendering down into the muscle fibers. That is the foundation your baste is going to cling to. Apply sauce too early and you risk burning sugars, creating a bitter char instead of that beautiful caramelized bark.
Basting works best when done in repeated thin coats every 30 to 45 minutes during the final stage of the cook. Think of it like painting a wall. One thick coat drips and looks sloppy. Multiple thin coats build up a rich, even finish. The same principle applies here. Each layer of baste gets set by the heat, creating a sticky lacquer that compounds in flavor and complexity. By the time you pull those ribs off the grill and rest the meat for 15 minutes, you will have a rack that looks like it came straight out of a championship BBQ trailer.
How to Baste Ribs on Grill for Maximum Flavor
Basting ribs on the grill is the secret weapon every pitmaster uses to build deep, sticky, caramelized flavor layers. Learn the low and slow technique that locks in moisture and creates a gorgeous bark. Fire up the grill today and taste the difference.
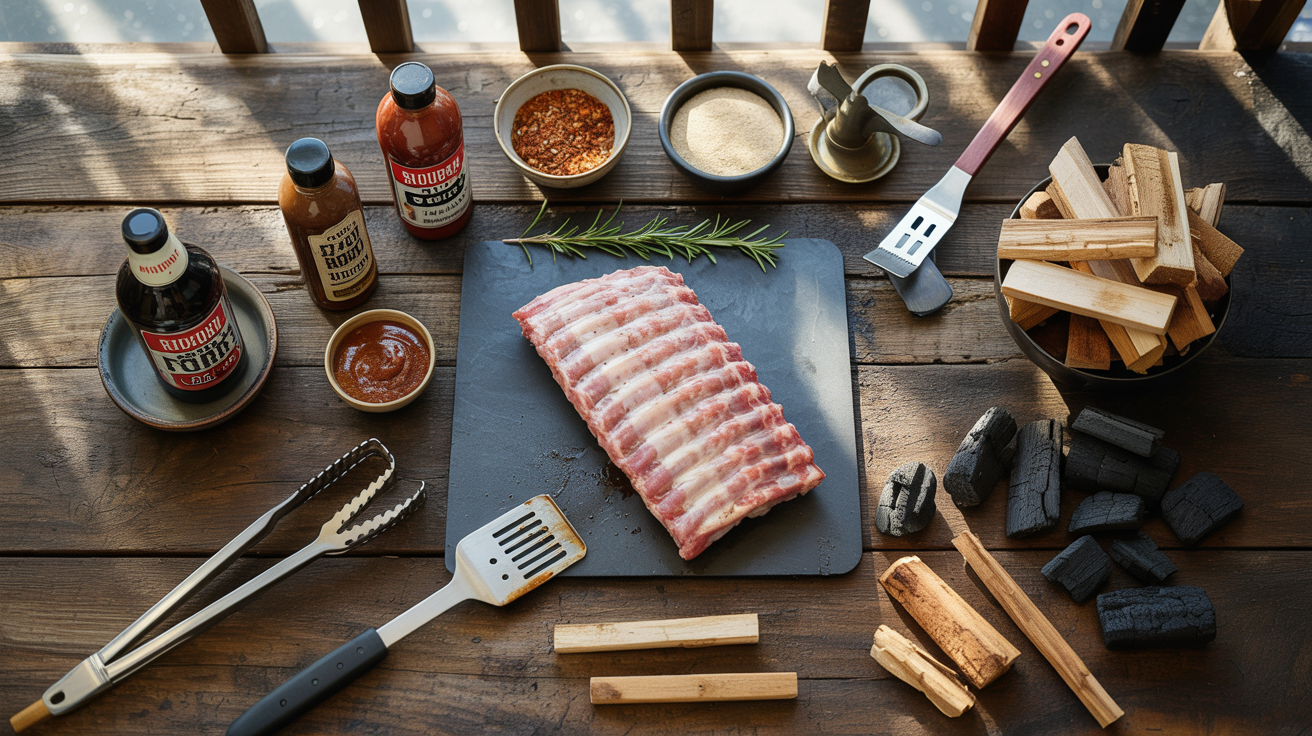
Ingredients
| AMOUNT | INGREDIENT | NOTES |
|---|---|---|
| 2 racks | pork spare ribs or baby back ribs | about 5 to 6 lbs total, membrane removed from the bone side |
| 4 tablespoons | yellow mustard | used as a binder to help the dry rub adhere to the meat |
| 4 tablespoons | brown sugar | packed, for the dry rub base |
| 2 tablespoons | smoked paprika | adds deep smoky color and flavor to the bark |
| 1 tablespoon | kosher salt | coarse grind for even seasoning penetration |
| 1 tablespoon | black pepper | coarse ground for bark texture |
| 1 tablespoon | garlic powder | for savory depth in the rub |
| 1 teaspoon | cayenne pepper | adjust to your heat preference |
| 1 teaspoon | onion powder | rounds out the savory rub profile |
| 1 cup | your favorite BBQ sauce | Kansas City style or homemade works best for basting |
| 0.25 cup | apple cider vinegar | mixed into the baste to thin and add brightness |
| 2 tablespoons | honey | stirs into the baste sauce for extra caramelization |
| 1 tablespoon | Worcestershire sauce | adds umami depth to the basting liquid |
| 0.5 cup | apple juice | for spritzing between baste coats to maintain moisture |
| 3 chunks | hickory or cherry wood chunks | for smoke flavor, chunks work better than chips for long cooks |
Instructions

Nutrition (per serving)
The BBQ Story Behind This Recipe
Rib basting as a technique has deep roots in American BBQ culture, stretching back centuries to the open pit cooking traditions of the American South. Indigenous peoples and early African American pitmasters developed slow fire cooking methods that used animal fats, vinegars, and herb mixtures to keep large cuts of meat moist over long cook times. This was not about aesthetics. It was survival cooking that made tough, inexpensive cuts palatable and nourishing. The act of repeatedly mopping or basting meat over a fire became a ritual passed down through generations, evolving differently across regions as local ingredients shaped the flavors.
By the time regional BBQ styles hardened into identities in the 19th and 20th centuries, basting sauces had diverged dramatically depending on where you were standing. In Kansas City, thick molasses-forward sauces became the basting standard, building that iconic sticky glaze. The Carolinas kept it sharp with vinegar and pepper-based mops that cut through pork fat with acidity. Memphis pitmasters developed dry and wet hybrid styles, using a thin baste to keep ribs moist while still honoring the dry rub bark. Each tradition understood the same fundamental truth: basting is how you communicate with the meat throughout the cook, coaxing out flavor at every stage of the journey.
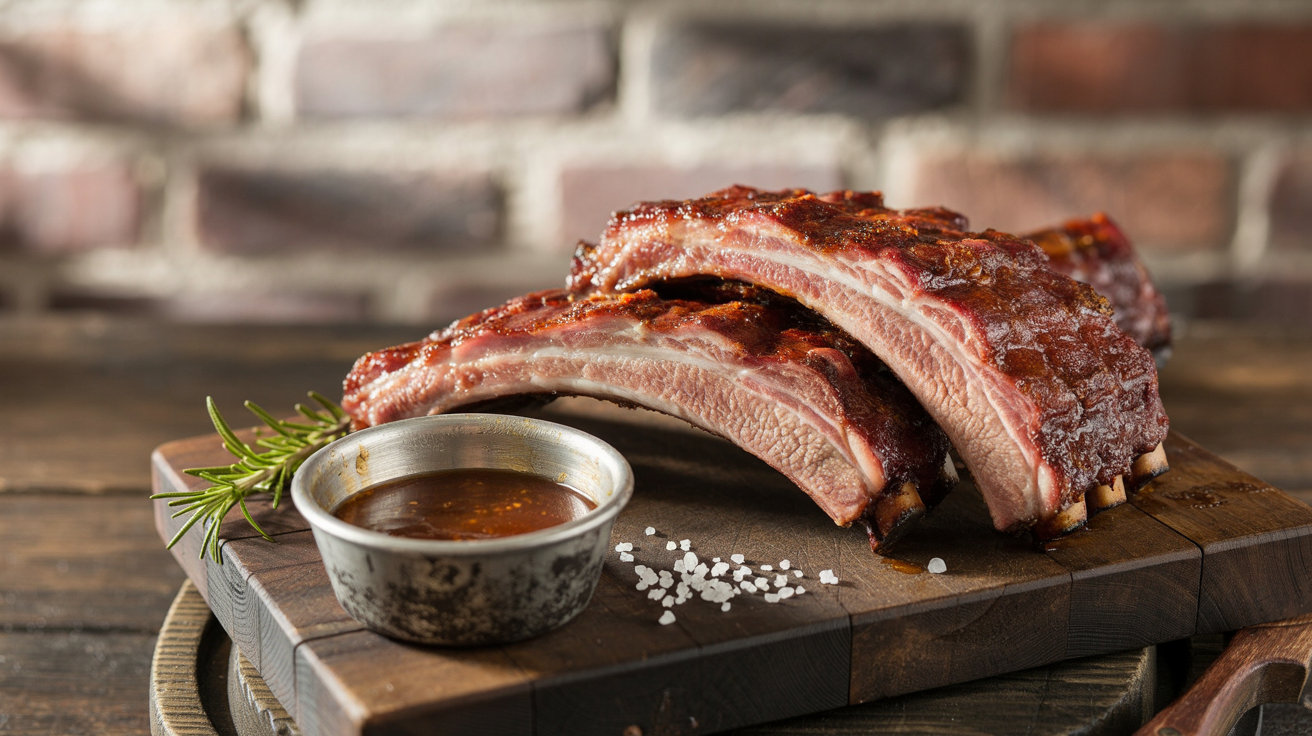
Hot Off the Grill
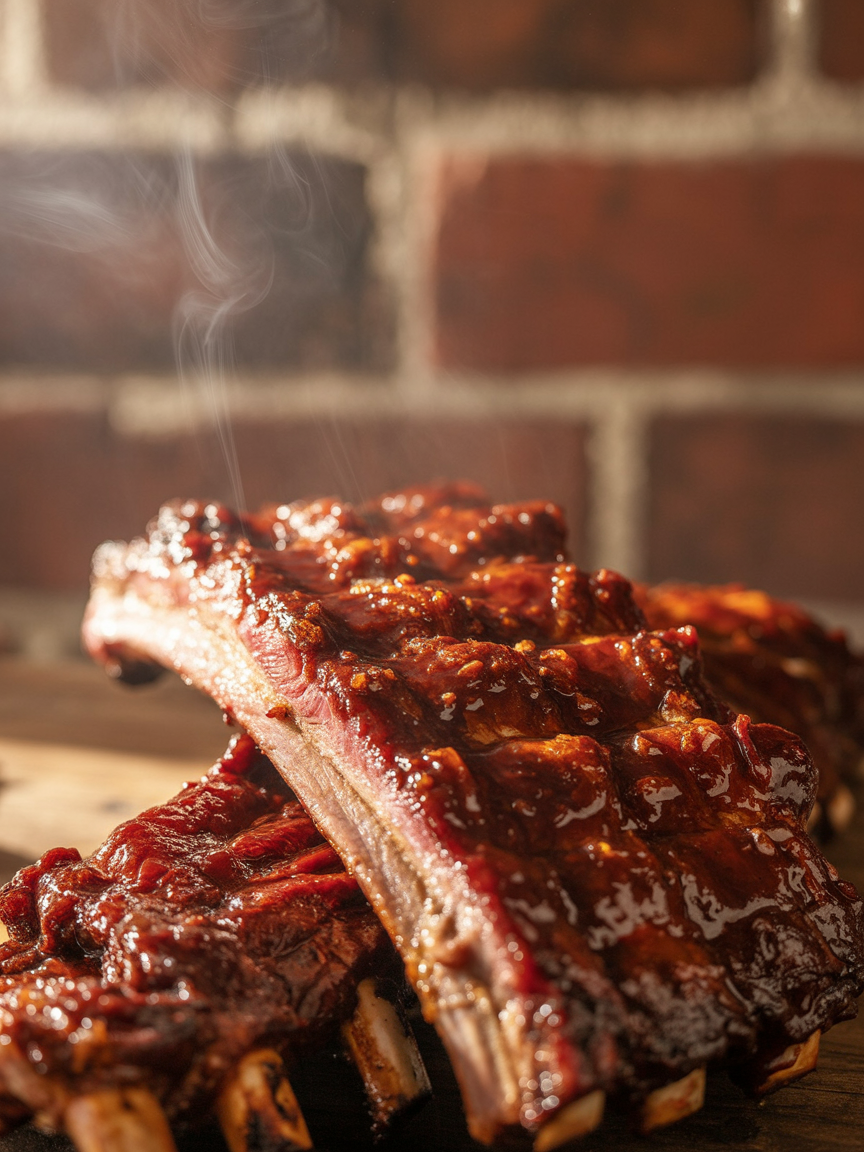
A Closer Look
Pitmaster Tips for Best Results
- Never baste during the first 90 minutes to 2 hours of the cook. Applying sauce too early causes the sugars to burn before the bark has had time to set, resulting in a bitter, black crust rather than a deep mahogany glaze. Let the rub do its job first and wait until you have a solid foundation before the baste goes on.
- Always warm your basting sauce to at least 100 to 110 degrees Fahrenheit before applying it to the hot ribs. Cold sauce drops the surface temperature of the meat, causes the fat to seize, and can add an extra 20 to 30 minutes to your overall cook time. Keep a small saucepan on a side burner throughout the cook.
- Use cherry wood or apple wood for your smoke chunks when basting with a sweet sauce. These fruitwoods complement the sweetness of honey and brown sugar-based bastes far better than mesquite, which can clash with sweet flavors and turn bitter on longer cooks over 4 hours.
- Apply your final two or three baste coats at a higher grill temp of 275 to 300 degrees Fahrenheit if your ribs are already probe tender. The elevated heat during the last 20 minutes will set the glaze faster, creating a tackier, more caramelized finish without overcooking the interior of the meat.
- For competition-level results, reserve a small portion of your dry rub and dust a very light coat over the final baste layer during the last 15 minutes of the cook. This creates a textured crust that has both the glossy lacquer of the sauce and the dry spice complexity of a traditional bark, giving you the best of both worlds in every single bite.
🔧 Pitmaster Equipment
Charcoal Grill or Offset Smoker: Delivers authentic wood smoke flavor and gives you precise control over indirect heat zones essential for low and slow rib cooking.
Silicone Basting Brush or Mop Brush: A wide silicone brush or traditional cotton mop brush lets you apply thin even coats of baste without tearing the bark off the ribs.
Instant Read Thermometer: Monitor internal temp accurately throughout the cook. Ribs are done when they hit 195 to 203 degrees Fahrenheit for proper collagen breakdown.
Aluminum Foil: Used during the wrap phase of the 3-2-1 method to lock in moisture and accelerate the braise stage of the cook.
Long Tongs: Keep your hands safe while managing the fire, repositioning ribs, and handling hot foil-wrapped racks without dropping them.
Spray Bottle: Fill with apple juice or apple cider vinegar for light spritzing between baste coats to keep the bark moist and add subtle sweetness.
Small Saucepan: Warm your basting sauce on a side burner before applying. Cold sauce drops the surface temp of the meat and extends cook time unnecessarily.
Rib Rack: Keeps multiple racks standing upright to maximize grill space and ensure even smoke and heat circulation around all sides of the meat.
🔥 Variations
Pellet Grill Version: Set your pellet grill to 225 degrees Fahrenheit and load it with cherry or hickory pellets. The pellet grill makes it incredibly easy to maintain a steady low and slow temperature throughout the cook, so follow all the same basting steps and timing. Increase the temp to 275 degrees Fahrenheit for the final 30 minutes to set the glaze and build a firmer bark, since pellet grills tend to produce a lighter bark than charcoal or offset smokers.
Gas Grill Version: Set up your gas grill for two-zone indirect cooking by leaving one or two burners on low and keeping the others off. Place a smoker box filled with soaked hickory or cherry wood chips over the active burner to generate smoke. Aim for a grill temp of 225 to 250 degrees Fahrenheit with the lid closed and follow all the same basting timing and technique. Replenish the wood chips every 45 minutes since they burn off faster on a gas grill than wood chunks do on charcoal.
Carolina Vinegar Baste Version: Swap out the Kansas City-style BBQ sauce for a traditional Carolina mop made from 1 cup apple cider vinegar, 2 tablespoons red pepper flakes, 1 tablespoon brown sugar, and 1 teaspoon kosher salt. This thinner, tangier baste does not build the same thick lacquered glaze but instead keeps the ribs incredibly moist and adds a sharp acidic counterpoint to the rich pork fat. Apply it more frequently, every 20 to 25 minutes, since the thinner liquid evaporates faster than a sauce-based baste.
Honey Butter Baste Version: For an incredibly rich and indulgent take, replace the BBQ sauce baste with a honey butter mixture made from 4 tablespoons of unsalted butter, 3 tablespoons of raw honey, 1 tablespoon of hot sauce, and a pinch of smoked paprika melted together in a saucepan. Apply this during the final 45 minutes only, as the butter will burn if exposed to heat for too long. This variation creates a spectacular glossy finish with a buttery sweetness that is absolutely irresistible on baby back ribs.
Asian-Inspired Hoisin Baste Version: Build your basting sauce from hoisin sauce, soy sauce, fresh ginger, garlic, sesame oil, and rice vinegar for a bold East Asian-inspired flavor profile. Use five spice powder in your dry rub instead of the standard BBQ blend. Apply the baste during the final 90 minutes of the cook using the same thin-layer technique. Finish with a sprinkle of toasted sesame seeds and sliced scallions after resting. These ribs pair beautifully with steamed jasmine rice and a cucumber salad.
❓ Pitmaster FAQ
How often should you baste ribs on the grill?
Apply baste every 30 to 45 minutes during the final 2 hours of the cook. Do not start basting until the initial bark has formed, which takes about 2 hours at 225 to 250 degrees Fahrenheit. Basting too early or too frequently will wash away the rub and prevent proper bark development. During the final 30 minutes you can apply baste every 10 to 12 minutes to build up a thick lacquered glaze.
What internal temperature should ribs reach?
Ribs are best when the internal temp reaches 195 to 203 degrees Fahrenheit. At this range, the collagen has fully converted to gelatin, giving you that tender, juicy, pull-from-the-bone texture. Use an instant read thermometer inserted between the bones without touching bone for an accurate reading. USDA guidelines set the safe minimum for pork at 145 degrees Fahrenheit, but for ribs that temp means the meat is still tough. Always go higher for proper texture.
Should you baste ribs before or after wrapping in foil?
Baste both before and after the foil wrap phase. Apply the first one or two thin coats during the open smoke phase before wrapping. Then apply the main layered basting during the unwrapped final hour after you remove them from the foil. The wrapped phase is about building tenderness through braising, while the unwrapped final phase is where you build your glaze and set the bark through repeated basting coats.
Can you baste ribs with the same sauce you serve at the table?
You can, but it is actually better practice to keep them separate. The basting brush that contacts raw or partially cooked meat can introduce bacteria into your serving sauce. Either keep a dedicated basting portion separate from the start, or heat any leftover baste to a full boil before serving it at the table to ensure it is safe. Many pitmasters make a double batch, one for cooking and one reserved clean for the table.
Why does my baste keep burning before the ribs are done?
Burning baste is almost always caused by one of three things: your grill temp is running too hot above 275 degrees Fahrenheit, you are applying baste too early before the bark has set, or your sauce has too much sugar with no fat or acid to balance it. Try thinning your baste with apple cider vinegar to increase its burn threshold, wait until the final 90 minutes before the first baste application, and keep your grill locked into that 225 to 250 degree range throughout the cook.
Can you baste ribs with butter instead of BBQ sauce?
Absolutely yes, and it is a technique used by many competition pitmasters. Melted butter basted onto ribs during the final 30 to 45 minutes of the cook adds incredible richness and helps create a gorgeous shiny finish. Mix the butter with a little honey and hot sauce for depth. Just be aware that pure butter has a lower smoke point than sauce, so apply it only during the final stage and keep your grill temp closer to 225 degrees Fahrenheit during those last coats to avoid flare-ups from dripping butter fat.